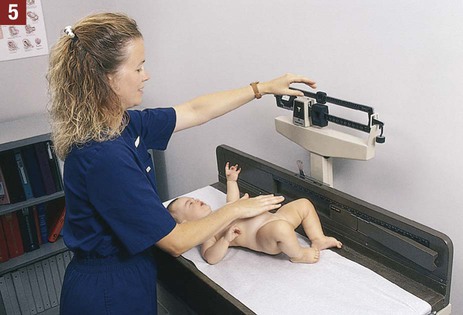
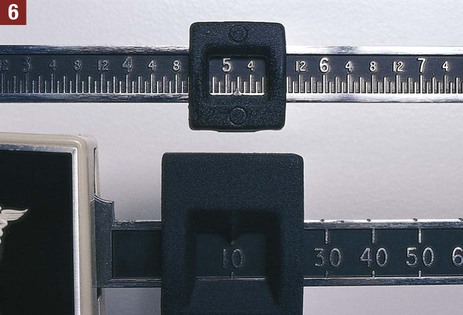
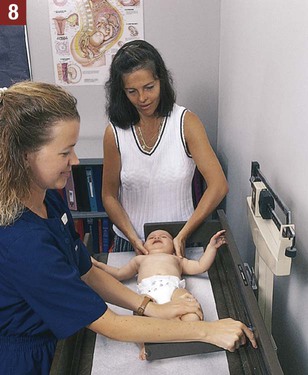
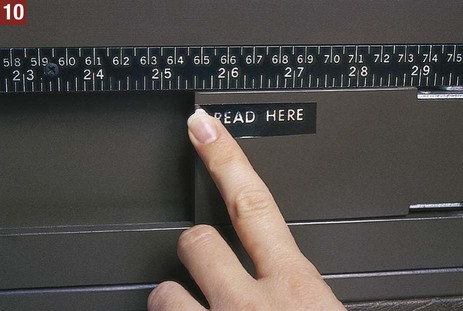
1. List the components of the well-child visit. 2. State the usual schedule for well-child visits. 3. Explain the purpose of the sick-child visit. 4. List the procedures performed by the medical assistant during pediatric office visits. 5. Explain why it is important to develop a rapport with the pediatric patient. 13. Describe the schedule for immunization of infants and children recommended by the American Academy of Pediatrics. 14. State the information that must be provided to parents as required by the National Childhood Vaccine Injury Act. 15. List the information that must be recorded in the medical record after administering an immunization. There are two broad categories of pediatric patient office visits. The first is the well-child visit (also termed health maintenance visit), in which the physician progressively evaluates the growth and development of the child. A physical examination is performed during each well-child visit and is directed toward discovering any abnormal conditions commonly associated with the stage of development reached by the child. Table 24-1 provides an outline of normal development during infancy. The child also receives necessary immunizations during these visits. Table 24-1 Milestones of Gross and Fine Motor Development in Infancy From Leahy JM, Kizilay PE: Foundations of nursing practice, Philadelphia, 1998, Saunders. The medical assistant must establish a rapport with the pediatric patient. If the medical assistant gains the child’s trust and confidence, the child is likely to cooperate during an examination or procedure. Interacting with children requires special techniques. The techniques employed depend on the age of the child. Toddlers and preschool children often respond well to making a game of the procedure. Explaining the purpose of an instrument (e.g., the stethoscope) to a school-age child and allowing him or her to hold the instrument or even to help during the procedure may overcome fears in that age group (Figure 24-1). The medical assistant should always explain the procedure to children who are able to understand. Each child must be approached at his or her level of understanding. To do this, the medical assistant should know what to expect from a child at a particular age, in terms of motor and social development. Each child has his or her own individual rate of development; the descriptions of normal development based on age are meant to serve as a guide only and may have to be modified to meet individual needs. In addition, it is normal for an ill child to regress to an earlier level of behavior. Table 24-2 outlines techniques that can be used with various age groups to gain their cooperation during an examination or procedure. Table 24-2 Techniques for Interaction with Children From Bonewit-West K: Clinical procedures for medical assistants, ed 8, St Louis, 2011, Saunders. The medical assistant slides the left hand and arm under the infant’s back and grasps the infant’s arm from behind. The thumb and fingers should encircle the infant’s forearm. The infant’s head, shoulders, and back are supported by the medical assistant’s arm. Next, the medical assistant slips the right arm up and under the infant’s buttocks. The infant is cradled in the arm with his or her body resting against the medical assistant’s chest (Figure 24-2). The medical assistant slips the right hand under the infant’s head and shoulders. The fingers should be spread apart to support the infant’s head and neck. The left forearm is slipped under the infant’s buttocks to help support the infant’s weight. The infant should be allowed to rest against the medical assistant’s chest with the cheek resting on the medical assistant’s shoulder (Figure 24-3). A child’s weight is often used to determine nutritional needs and the proper dosage of a medication to administer to the child. The medical assistant should exercise care in measuring weight. Infants are weighed in a recumbent position, as outlined in Procedure 24-1. Older children are weighed in a standing position, as presented in Chapter 20. Measure the weight and length of an infant. 1. Procedural Step. Sanitize your hands. 2. Procedural Step. Greet the infant’s parent and introduce yourself. Identify the infant and explain the procedure to the parent. The weight of the infant is usually measured first. Depending on the medical office policy, ask the parent to perform one of the following: 3. Procedural Step. Unlock the pediatric scale, and place a clean paper protector on it. Check the balance scale for accuracy, making sure to compensate for the weight of the paper. 4. Procedural Step. Gently place the infant on his or her back on the table of the scale. Place one hand slightly above the infant as a safety precaution. 5. Procedural Step. Balance the scale as follows: a. Move the lower weight to the notched groove that does not cause the indicator point to drop to the bottom of the calibration area. Ensure that the lower weight is seated firmly in its groove. b. Slowly slide the upper weight along its calibration bar by tapping it gently until the indicator point comes to rest at the center of the balance area. Principle. Not seating the lower weight firmly in its groove results in an inaccurate reading. 6. Procedural Step. Read the results in pounds and ounces while the infant is lying still. Jot down this value or make a mental note of it. (NOTE: The result on the pictured scale is 15 lb and 2 oz.) 7. Procedural Step. Return the balance to its resting position, and lock the scale. 8. Procedural Step. Place the vertex (top) of the infant’s head against the headboard at the zero mark. Ask the parent to hold the infant’s head in this position. 9. Procedural Step. Straighten the infant’s knees, and place the soles of his or her feet firmly against the upright footboard (to create a right angle). 10. Procedural Step. Read the infant’s length in inches (to the nearest 11. Procedural Step. Gently remove the infant from the table, and hand him or her to the parent. Return the headboard and footboard to their resting positions. 12. Procedural Step. Sanitize your hands, and chart the results. Another measure of a child’s growth is length, or height (stature). Length is measured in children younger than 24 months. The recumbent length is a measurement from the vertex of the head to the heel of the infant in a supine position, as outlined in Procedure 24-1. Two people are often needed to determine the length of an infant accurately. The parent’s help can be requested; the medical assistant must provide the parent with thorough instructions on what is to be done. Older children have their height measured in a standing position (Figure 24-4), as presented in Chapter 20.
The Pediatric Examination
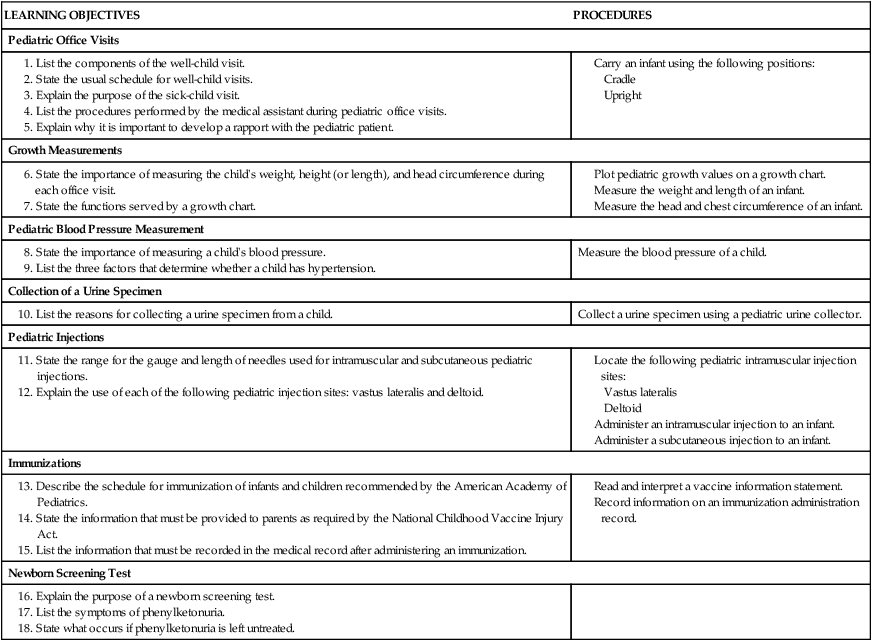
LEARNING OBJECTIVES
PROCEDURES
Pediatric Office Visits
Growth Measurements
Pediatric Blood Pressure Measurement
Measure the blood pressure of a child.
Collection of a Urine Specimen
Collect a urine specimen using a pediatric urine collector.
Pediatric Injections
Immunizations
Newborn Screening Test
Pediatric Office Visits
Average Age (mo)
Gross Motor
Fine Motor
1
Turns head from side to side
Grasping reflex present
2
Holds head at 45-degree angle when prone
Holds rattle briefly
3
Begins rolling over
Grasps rattle or dangling objects
4
Slight head lag when pulled to sitting position
Brings objects to mouth
5
No head wobble when held in sitting position
Transfers objects from hand to hand
6
Sits without support
Manipulates and examines large objects with hands
7
Stands while holding on
Reaches for, grabs, and retains object
8
Pulls self to stand
Grasps objects with thumb and finger
9
Crawls backward
Begins to show hand preference
10
Creeps on hands and knees
Hits cup with spoon
11
Walks using furniture for support
Picks up small objects with thumb and forefinger (pincer grasp)
12
Stands alone easily
Puts three or more objects into container
12-16
Walks alone easily
Turns two or three pages in large cardboard book
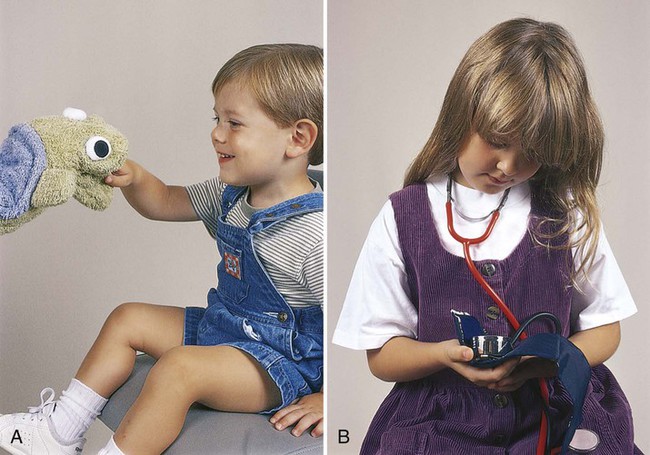
Developing A Rapport
Technique
Infant (Birth-1 yr)
Toddler (1-3 yr)
Preschool (3-6 yr)
School Age (6-12 yr)
Adolescent (12-18 yr)
Avoid sudden motion and loud or abrupt noises.


Limit number of strangers in room.

Use distractions, bright objects, rattles, and talking to gain cooperation.

Physically restrain child if necessary to ensure safety.


Allow physical contact with parent during procedure.


Encourage parent to comfort child after procedure.


Use play to explain procedure (e.g., dolls, puppets).


Perform procedures quickly, if possible.


Use concrete terms, rather than abstract terms.


Avoid words that have more than one meaning (e.g., shot).


Give child permission to cry, yell, or otherwise express pain verbally.


Praise child for cooperative behavior.


Allow child to handle equipment, if possible.


Make sure child understands body part to be involved.


Try to describe how procedure will feel.


Tell child about any discomfort that may be felt, but don’t dwell on it.


Stress benefits of anything child may find pleasurable afterward (e.g., stickers, feeling better).


Give child choices when possible (e.g., arm to use).


Suggest ways to maintain control (e.g., counting, deep breathing, relaxation).


Use drawing and diagrams to illustrate parts of body that will be involved.


Encourage participation such as holding instrument during procedure.


Include child in decision-making process.


Discuss risks of procedure.

Provide information about appearance changes that might result.

Give child educational brochures or have him or her view videos about procedure.

Ask parent to step out if child does not want parent in examining room.


Carrying the Infant
Cradle Position

Upright Position

Growth Measurements
Weight
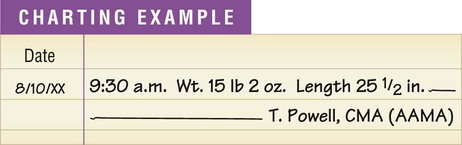
 Procedure 24-1 Measuring the Weight and Length of an Infant
 inch) from the measure. Jot down this value or make a mental note of it. (NOTE: The result on this scale is
  inches.)
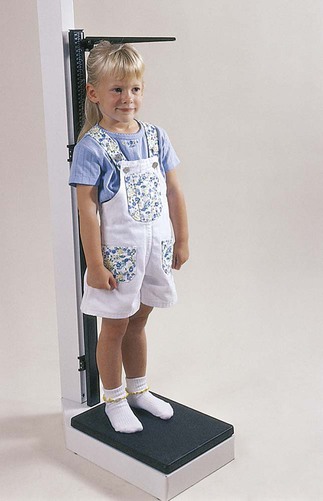
Length and Height
![]()
Stay updated, free articles. Join our Telegram channel

Full access? Get Clinical Tree


The Pediatric Examination


Get Clinical Tree app for offline access
