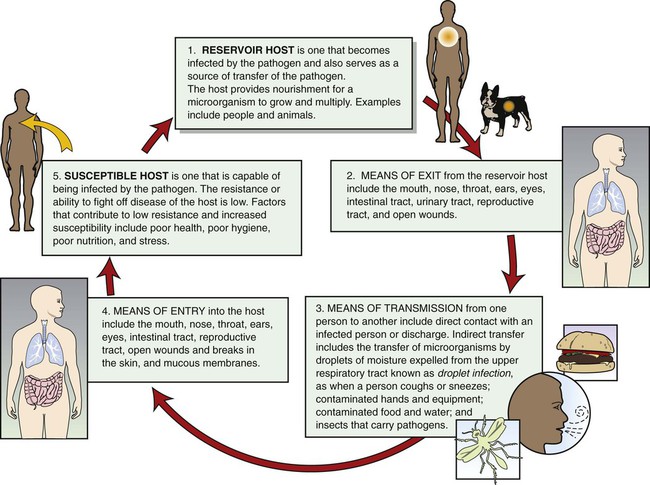
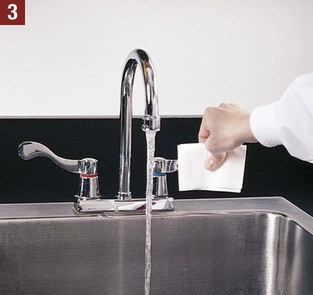
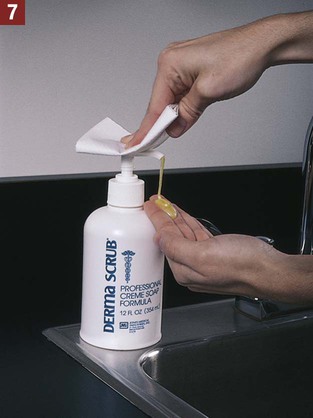
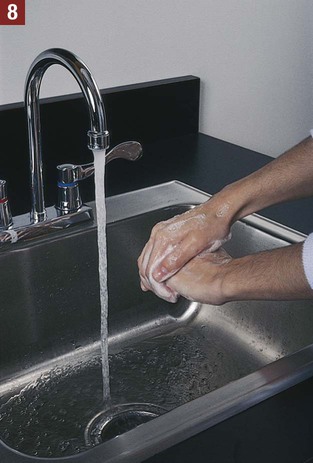
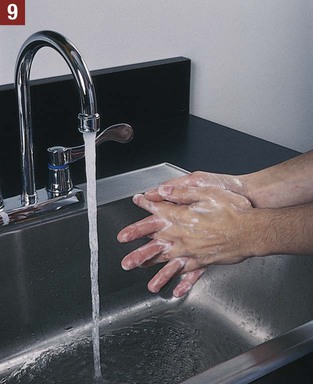
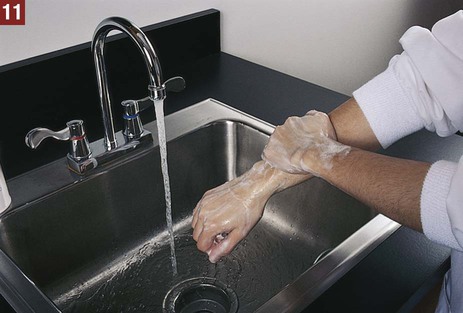
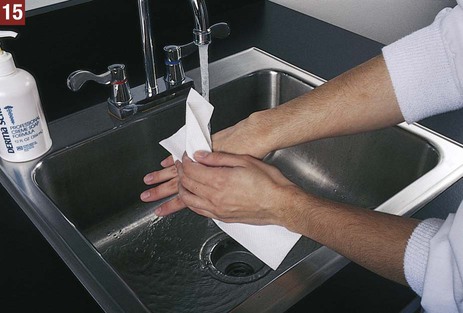
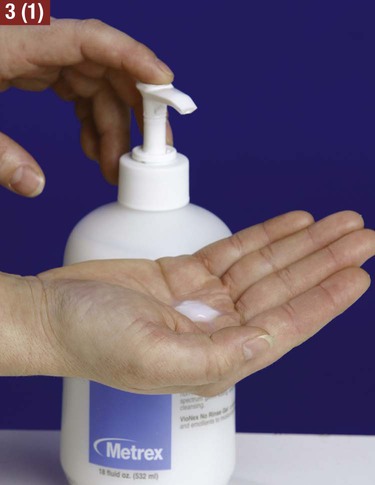
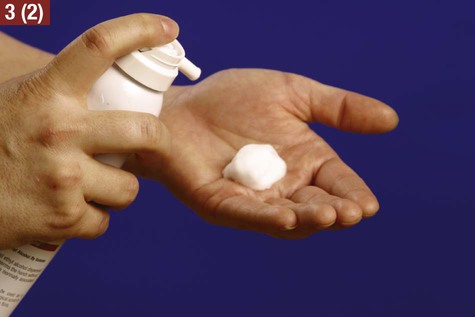
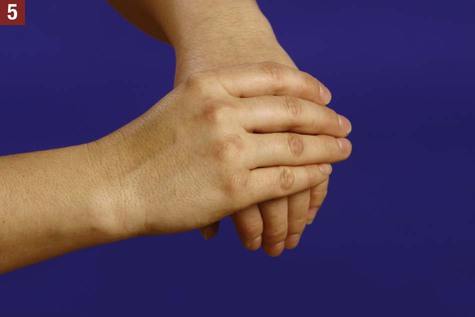
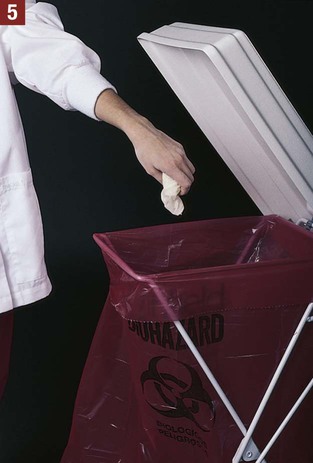
1. Proper nutrition. Microorganisms that use inorganic or nonliving substances as sources of food are known as autotrophs. Microorganisms that use organic or living substances for food are known as heterotrophs. 2. Oxygen. Most microorganisms need oxygen to grow and multiply and are termed aerobes. Other microorganisms, known as anaerobes, grow best in the absence of oxygen. 3. Temperature. Each microorganism has a temperature at which it grows best, known as the optimum growth temperature. Most microorganisms grow best at 98.6° F (37° C), the human body temperature. 4. Darkness. Microorganisms grow best in darkness. 5. Moisture. Microorganisms need moisture for cell metabolism and to carry away wastes. 6. pH. Most microorganisms prefer a neutral pH. If the environment of the microorganisms becomes too acidic or too basic, they die. For a pathogen to survive and produce disease, a continuous cycle must be followed; this is known as the infection process cycle (Figure 17-1). If the cycle is broken at any point, the pathogen dies. The medical assistant has a responsibility to help break this cycle in the medical office by practicing good techniques of medical asepsis. These techniques are discussed in the next section. 1. The skin is the body’s most important defense mechanism; it serves as a protective barrier against the entrance of microorganisms. 2. The mucous membranes of the body, which line the nose and throat and respiratory, gastrointestinal, and genital tracts, help protect the body from invasion by microorganisms. 3. Mucus and cilia in the nose and respiratory tract fight off pathogens. Mucus traps the smaller microorganisms that enter the body, and the hairlike cilia constantly beat toward the outside to remove them from the body. 4. Coughing and sneezing help force pathogens from the body. 5. Tears and sweat are secretions that aid in the removal of pathogens from the body. 6. Urine and vaginal secretions are acidic. Pathogens cannot grow in an acidic environment. 7. The stomach secretes hydrochloric acid, which helps in the process of digestion. This acidic environment discourages the growth of pathogens that enter the stomach. The Centers for Disease Control and Prevention (CDC) has issued new recommendations for hand hygiene in health care settings. The purpose of these guidelines is to promote improved hand hygiene practices and to reduce transmission of pathogenic microorganisms to patients and employees in health care settings. The CDC guidelines for hand hygiene as they apply to the medical office are outlined in Box 17-1. They are also discussed further in this section. BOX 17-1 CDC Guidelines for Hand Hygiene in Health Care Settings Apply an Alcohol-Based Hand Rub (or Wash Hands) • Before having direct patient contact • After contact with a patient’s intact skin (e.g., measuring pulse or blood pressure) • Before applying and after removing gloves • After contact with body fluids or excretions, mucous membranes, nonintact skin, and wound dressings as long as the hands are not visibly soiled • When moving from a contaminated body site to a clean body site during patient care • After contact with inanimate objects (e.g., medical equipment) when providing health care to a patient • Keep natural nail tips less than • Do not add soap to a partially empty liquid soap dispenser. The practice of “topping off” dispensers can lead to bacterial contamination of the soap. The correct procedure is either to dispose of an empty dispenser or to rinse an empty dispenser thoroughly and then refill it. • Multiple-use cloth towels of the hanging or roll type are not recommended. • Use hand lotions or creams to minimize the occurrence of dermatitis associated with frequent handwashing. • Wear gloves if contact with blood or other potentially infectious materials, mucous membranes, and nonintact skin could occur. • Change gloves during patient care if moving from a contaminated body site to a clean body site. • Remove gloves after caring for a patient. Do not wear the same pair of gloves for the care of more than one patient. From Bonewit-West K: Clinical procedures for medical assistants, ed 8, St Louis, 2011, Saunders. Handwashing refers to washing the hands with a detergent soap and water. Detergent soap (commonly known as plain soap) contains agents that help break down and emulsify dirt and oil present on the skin. Soap is used to sanitize the hands through the physical removal of dirt and transient flora. It is important to use adequate friction during handwashing to ensure the removal of all transient flora. The CDC recommends that the hands be rubbed together for at least 15 seconds, making sure to cover all surfaces and to focus on the fingertips and fingernails. Procedure 17-1 outlines the handwashing procedure. 1. Procedural Step. Remove your watch or push it up on the forearm so that the wrist is clear. Avoid wearing rings. If you wear rings, remove all except a plain wedding band and put them in a safe place. Principle. Microorganisms can lodge in the crevices and grooves of rings. 2. Procedural Step. Stand at the sink, making sure clothing does not touch the sink. 3. Procedural Step. Turn on the faucets, using a paper towel. Principle. The faucets are considered contaminated because they harbor microorganisms. 4. Procedural Step. Adjust the water temperature. The water should be warm to make the best suds. 5. Procedural Step. Discard the paper towel in the waste container. Principle. The paper towel is considered contaminated after touching the faucets. 6. Procedural Step. Wet the hands and forearms thoroughly with water. The hands should be held lower than the elbows at all times. Do not touch the inside of the sink because it is also contaminated. 7. Procedural Step. Apply soap to the hands. Apply 1 teaspoon of liquid soap (approximately the size of a nickel) to the palm of one hand. 8. Procedural Step. Wash the palms and backs of the hands with 10 circular motions. Use friction along with the circular motions to wash the palm and back of each hand. Principle. Friction helps to dislodge and remove microorganisms from the hands. 9. Procedural Step. Wash the fingers with 10 circular motions while focusing on the fingertips and fingernails. Interlace the fingers and thumbs, and use friction and circular motions while rubbing the fingers back and forth. 10. Procedural Step. Rinse well, making sure to hold the hands lower than the elbows. Principle. Running water helps to rinse away dirt and microorganisms. 11. Procedural Step. Wash the wrists and forearms, using friction along with circular motions. 12. Procedural Step. Clean the fingernails with a manicure stick. The fingernails should be cleaned at least once daily, preferably during initial handwashing (i.e., handwashing performed just after arriving at the medical office to begin your day). Principle. Dirt and microorganisms collect underneath the fingernails. 13. Procedural Step. Rinse the arms and hands. Principle. The running water rinses away the dirt and microorganisms. 14. Procedural Step. Repeat the handwashing procedure. For initial handwashing or when the hands come into contact with blood or other potentially infectious materials, the handwashing procedure should be repeated to ensure removal of all pathogens. 15. Procedural Step. Dry the hands gently and thoroughly, and discard the paper towel. 16. Procedural Step. Turn off the water, using a paper towel, and discard the paper towel in a waste container. Principle. The faucet is considered contaminated, whereas the hands are medically aseptic or clean. 17. Procedural Step. Do not touch the sink with the bare hands. Principle. The hands are now medically aseptic, and the sink is considered contaminated. The CDC hand hygiene guidelines recommend that handwashing be performed when the hands are visibly soiled with dirt or body fluids, before eating, and after using the restroom (see Box 17-1). If the hands are not visibly soiled, the CDC recommends that an alcohol-based hand rub, rather than handwashing, be used to sanitize the hands. This is because repeated handwashing tends to dry out the hands, leading to irritation, chapping, and dermatitis. Washing the hands with an antimicrobial soap is termed antiseptic handwashing. Antimicrobial soaps contain an antiseptic, which is an agent that functions to kill or inhibit the growth of microorganisms (Figure 17-2, A). Antiseptic handwashing sanitizes the hands through the mechanical scrubbing action and through the action of the antiseptic. Proper handwashing with an antimicrobial soap removes all soil and transient flora from the hands. Most antimicrobial soaps also deposit an antibacterial film on the skin that discourages bacterial growth. Antiseptic handwashing should be performed by the medical assistant before assisting with minor office surgery. Examples of antiseptics contained in antimicrobial soaps include triclosan, chlorhexidine, hexachlorophene, iodine, and chloroxylenol. CDC guidelines recommend the use of an alcohol-based hand rub for sanitizing the hands when they are not visibly soiled (see Box 17-1). Alcohol-based hand rubs, also known as hand sanitizers, consist of 60% to 90% alcohol (ethanol or isopropanol) and come in the forms of gels, lotions, and foams (Figure 17-2, B). Studies have shown that hand rubs are more effective than traditional soap and water handwashing in removing transient flora and reducing bacterial counts on the hands. The advantages that alcohol-based hand rubs offer over traditional handwashing are as follows: • Alcohol-based hand rubs are usually more accessible than sinks. • They do not require rinsing; water or hand drying with a towel is not needed. • Less time is required to perform hand hygiene. It takes 20 to 30 seconds to sanitize the hands with an alcohol-based hand rub compared with 1 to 2 minutes to perform proper handwashing. • They are less damaging to the skin, resulting in less dryness and irritation. Most alcohol-based hand rubs contain emollients, which help prevent the skin of the hands from overdrying. As the alcohol dries, protective fats and oils remain on the hands. Alcohol-based hand rubs have disadvantages. They are more expensive than plain soap. They also cause a brief stinging sensation if they are applied to broken skin, such as a cut or abrasion on the hand. Procedure 17-2 describes the proper steps for performing an alcohol-based hand rub. Apply an alcohol-based hand rub. 1. Procedural Step. Inspect the hands to ensure that they are not visibly soiled. Hands that are visibly soiled must be washed with soap and water. Principle. Alcohol-based hand rubs are not intended for the removal of visible soil. 2. Procedural Step. Remove your watch or push it up on the forearm. Avoid wearing rings. If you wear rings, remove all except a plain wedding band and put them in a safe place. Principle. Microorganisms can lodge in the crevices and grooves of rings. 3. Procedural Step. Apply the alcohol-based hand rub to the palm of one hand as follows: 4. Procedural Step. Thoroughly spread the hand rub over all surfaces of both hands (and fingers) up to 5. Procedural Step. Rub the hands together until they are dry; this usually takes 10 to 30 seconds. Allow your hands to dry completely before touching anything. The hands are now medically aseptic. 1. Follow the OSHA Bloodborne Pathogens Standard (presented in this chapter). 2. Keep the medical office free from dirt and dust, which can collect and carry microorganisms. 3. Ensure that the reception area and examining rooms are well ventilated. Stuffy rooms encourage microorganisms to settle on objects. 4. Keep the reception area and examining rooms bright and airy. Light discourages the growth of microorganisms. 5. Eliminate insects by the use of insecticides or window screens. Insects are a means of transmission of microorganisms. 6. Carefully dispose of wastes, such as urine, feces, and respiratory secretions; all wastes should be handled as though they contained pathogens. 7. Do not let soiled items touch clothing. 8. Avoid coughs and sneezes of patients. Moisture droplets expelled from the lungs with coughing and sneezing may contain pathogens. 9. Use discretion in the amount of jewelry worn; wear minimal jewelry or no jewelry at all. Microorganisms can become lodged in the grooves and crevices of jewelry and serve as a means of transmission of pathogens. 10. Teach patients aseptic practices to control the spread of infection at home. Gloves reduce hand contamination by 70% to 80%, reduce cross-contamination between patients, and protect patients and health care workers from infection. The CDC recommends that clean disposable gloves be worn when the medical assistant is likely to come in contact with any body substance, such as blood, urine, feces, mucous membranes, and nonintact skin. Clean disposable gloves should be worn when administering an injection, performing a venipuncture, or performing a urinalysis. Clean disposable gloves come in the following sizes: small, medium, large, and extra large, and sometimes extra small. Procedure 17-3 presents the proper method for applying and removing clean disposable gloves. Applying Clean Disposable Gloves 1. Procedural Step. Remove all rings, and sanitize your hands. Handwashing should be performed if the hands are visibly soiled. If this is not the case, use an alcohol-based hand rub to sanitize the hands. Ensure that your hands are completely dry. 2. Procedural Step. Choose the appropriate size of gloves; they should not be too small or too large. The gloves should fit snugly but not be too tight. Apply the gloves, and adjust them so they fit comfortably. 3. Procedural Step. Inspect the gloves for tears. If a tear is present, a new pair of gloves must be applied. Removing Clean Disposable Gloves 1. Procedural Step. Grasp the outside of the left glove 1 to 2 inches from the top with your gloved right hand. 2. Procedural Step. Slowly pull the left glove off the hand. It will turn inside out as it is removed from your hand. 3. Procedural Step. Pull the left glove free, and scrunch it into a ball with your gloved right hand. 4. Procedural Step. Place the index and middle fingers of the left hand on the inside of the right glove. Do not allow your clean hand to touch the outside of the glove. 5. Procedural Step. Pull the glove off the right hand. It will turn inside out as it is removed from your hand, enclosing the balled-up left glove. Discard both gloves in an appropriate container. If your gloves are visibly contaminated with blood or other potentially infectious materials, discard them in a biohazard waste container. Otherwise, they can be discarded in a regular waste container.
Medical Asepsis and the OSHA Standard
Introduction to Medical Asepsis and the OSHA Standard
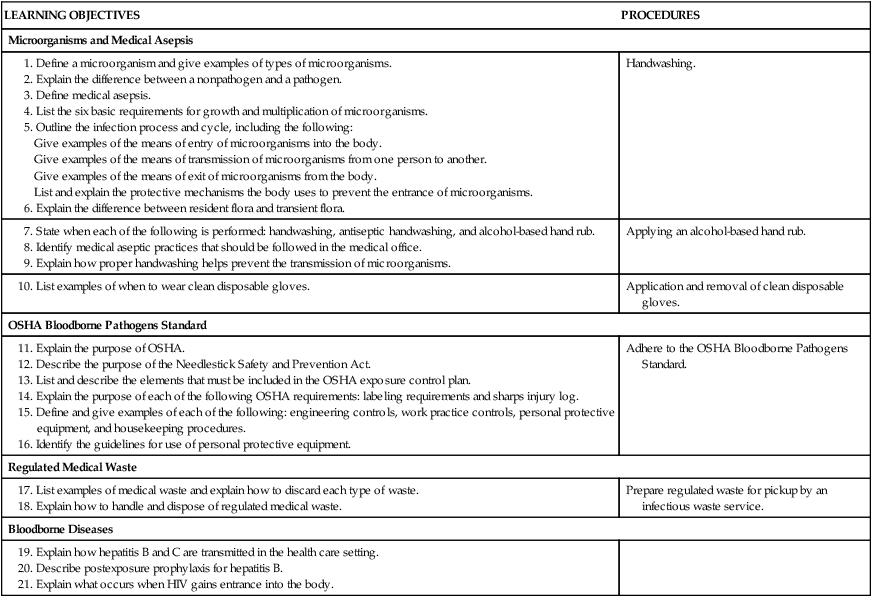
Microorganisms and Medical Asepsis
Growth Requirements for Microorganisms
Infection Process Cycle
Protective Mechanisms of the Body
Medical Asepsis in the Medical Office
Hand Hygiene
 inch long. Avoid wearing artificial nails.
Handwashing
 Procedure 17-1 Handwashing
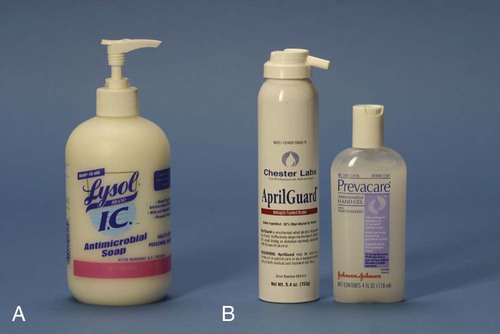
Antiseptic Handwashing
Alcohol-Based Hand Rubs
 Procedure 17-2 Applying an Alcohol-Based Hand Rub
 inch above the wrist. Spread the hand rub around the fingertips and around and under your fingernails.
Infection Control
Gloves
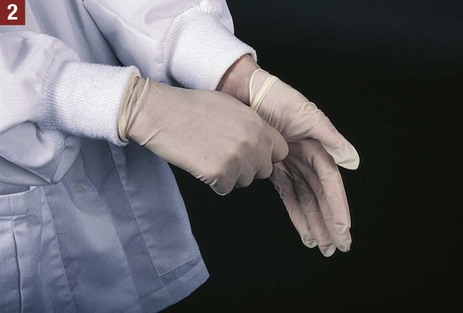
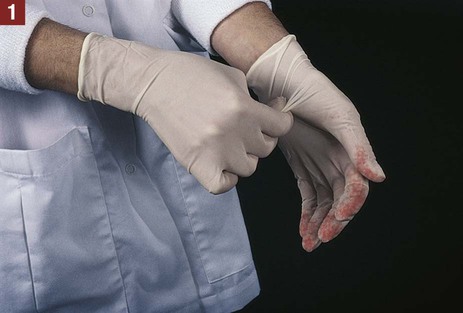
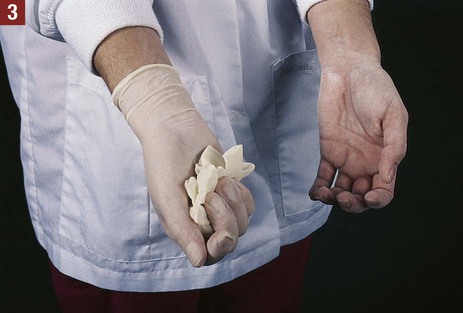
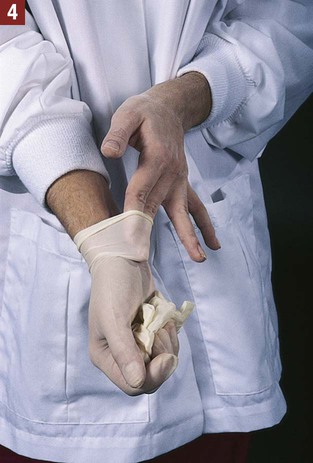
 Procedure 17-3 Application and Removal of Clean Disposable Gloves

![]()
Stay updated, free articles. Join our Telegram channel

Full access? Get Clinical Tree


Medical Asepsis and the OSHA Standard


Get Clinical Tree app for offline access