action
indications
contraindications
application
removal.
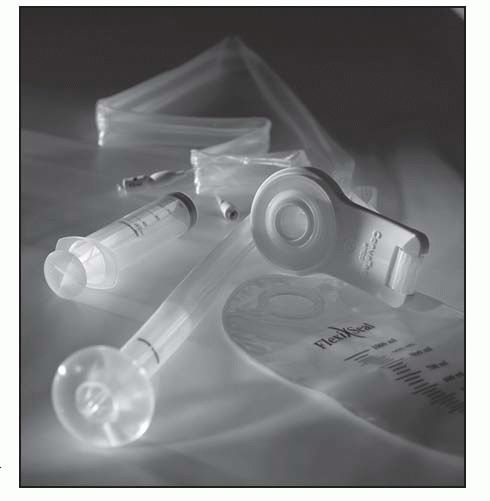
Catheter kit: | Contains catheter, collection bag, irrigation bag, syringe, lubricant and instructions |
Disposable collection bag: | 2,000 mL capacity |
Drainable collection bag: | 3,000 mL capacity |
Irrigation bag | |
 |
Not for use in patients allergic to the materials used in this device
Not for use if the patient’s distal rectum can’t accommodate the inflated volume of the retention cuff or if the distal rectum-anal canal is severely strictured
Not for use in patients with impacted stool
Not for use in patients with a recent (less than 6 weeks old) rectal anastomosis or anal or sphincter reconstruction
Not for use in patients with compromised rectal wall integrity
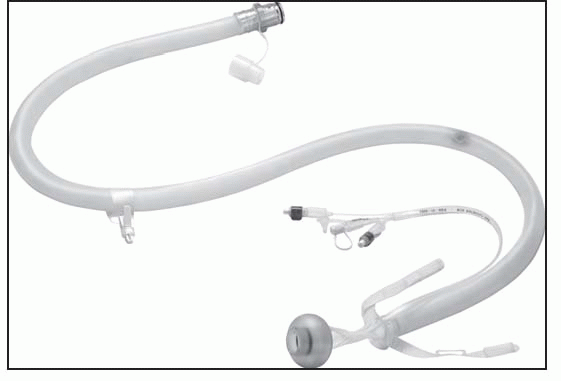
Caution: Before using the ActiFlo Indwelling Bowel Catheter System, read the entire ActiFlo Indwelling Bowel Catheter System Instructions for Use package insert supplied with the product. Read all other package inserts and labels supplied with the product and accessories.
Federal law restricts this device for sale by or on the order of a physician or other healthcare practitioner licensed under state law to order this product.
Skin substitute: | 25 cm2, 80 cm2, 120 cm2; Q4115 |
Trunk, arms, legs (includes ankle): | CPT 15271-15274 |
CPT 15271: | first 25 cm2 CPT 15272: each additional 25 cm2 up to maximum 100 cm2 area or 1% body area of infants/children |
CPT 15273: | first 100 cm2 or 1% of body area of infants/children |
CPT 15724: | each additional 100 cm2 or 1% of body area |
Face, scalp, eyelids, mouth, neck, ears, orbits, genitalia, hands, feet, and/or multiple digits: | CPT 15275-15278 |
CPT 15275: | first 25 cm2 |
CPT 15276: | each additional 25 cm2 up to maximum 100 cm2 area or 1% body area of infants/children |
CPT 15277: | first 100 cm2 or 1% of body area of infants/children |
CPT 15278: | each additional 100 cm2 or 1% of body area |
 |
Contraindicated for use in a grossly infected wound
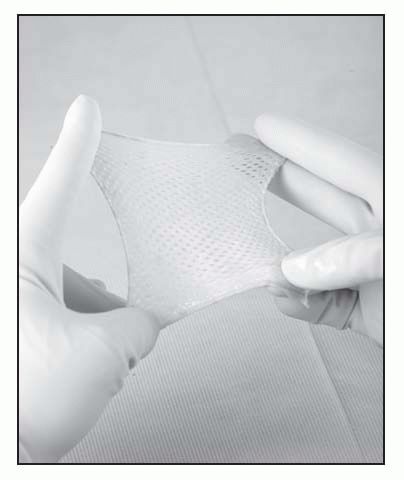
Apply AlloSkin to a clean, properly prepared wound bed.
Thaw inner AlloSkin package in sterile solution for at least 1 minute; remove product from inner package, remove gauze backing, and rinse once with sterile water or saline.
Apply AlloSkin to wound dermal (shiny) side down. Stretch so graft has contact with all wound contours and trim excess graft to fit wound.
Anchor graft as appropriate (can staple, suture, steri-strip, or tack with silicone dressing) and dress graft as appropriate for amount of exudate and location of wound. Almost any dressing is appropriate for use over AlloSkin graft, including silver dressings and foams. May use in conjunction with VAC and HBO therapy.
Evaluate healing progress after 7 days and manage wound exudate as needed.
If necessary, trim any dry nonadhered edges of the existing graft, then clean the wound surface.
Remove new AlloSkin graft if required to achieve wound closure.
Skin substitute: | 25 cm2, 80 cm2; Q4123 |
Trunk, arms, legs (includes ankle): | CPT 15271-15274 |
CPT 15271: | first 25 cm2 |
CPT 15272: | each additional 25 cm2 up to maximum 100 cm2 area or 1% body area of infants/children |
CPT 15273: | first 100 cm2 or 1% of body area of infants/children |
CPT 15724: | each additional 100 cm2 or 1% of body area |
Face, scalp, eyelids, mouth, neck, ears, orbits, genitalia, hands, feet, and/or multiple digits: | CPT 15275-15278 |
CPT 15275: | first 25 cm2 |
CPT 15276: | each additional 25 cm2 up to maximum 100 cm2 area or 1% body area of infants/children |
CPT 15277: | first 100 cm2 or 1% of body area of infants/children |
CPT 15278: | each additional 100 cm2 or 1% of body area |
Contraindicated for use in a grossly infected wound
Apply AlloSkin to a clean, properly prepared wound bed.
Thaw inner AlloSkin package in sterile solution for at least 1 minute; remove product from inner package, remove gauze backing, and rinse once with sterile water or saline.
Apply AlloSkin to wound dermal (shiny) side down. Stretch so graft has contact with all wound contours and trim excess graft to fit wound.
Anchor graft as appropriate (can staple, suture, steri-strip, or tack with silicone dressing), and dress graft as appropriate for amount of exudate and location of wound. Almost any dressing is appropriate for use over AlloSkin graft, including silver dressings and foams. May use in conjunction with VAC and HBO therapy.
Evaluate healing progress after 7 days, and manage wound exudate as needed.
Reapply new AlloSkin graft if required to achieve wound closure.
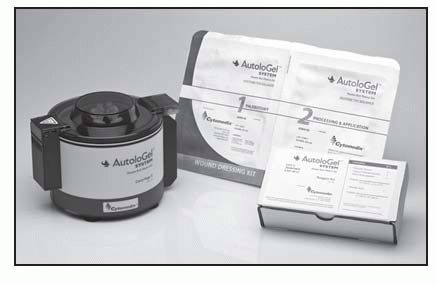
Wound Dressing Kit AGSW-02: | Case of 10 |
Reagent Kit AGSR-03: | Case of 10 |
Combination Kit of AGSW-02 and AGSR-03: | Case of 10 |
AutoloGel System Centrifuge II | |
 |
Malignancy in the wound bed, slough or necrotic tissue covering more than 75% of the wound bed, allergy to bovine products, active untreated infection.
Protect periwound with moisture barrier.
Apply the Gel to the prepared wound bed, and into undermining, sinus tracts, and tunnels.
Place a nonadherent contact layer on the Gel to help hold the Gel in the wound bed.
Cover with clear nonabsorbent semiocclusive dressing, such as a transparent film, as a primary dressing, then cover with an absorbent layer as a secondary dressing. The absorbent layer can be changed as often as needed until primary layer requires removal.
Leave primary dressing and Gel in place for 24 to 48 hours.
Application can be done up to twice per week. Use standard moist wound healing principles between applications.
Use standard methods for removal of primary dressing. Remove contact layer, cleanse wound and periwound.
Hydroconductive dressings with LevaFiber: | 2″ × 2″; A6196 | ||
3″ × 3″; A6196 | |||
4″ × 4″; A6196 | |||
6″ × 8″; A6197 | |||
8″ × 8″; A6198 | |||
Hydroconductive rolls with LevaFiber: | |||
3″ × 39″; A6199 | |||
4″ × 39″; A6199 | |||
8″ × 39″; A6199 | |||
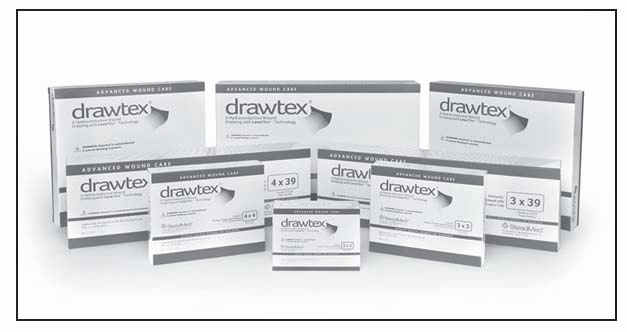 |
Cannot be used on arterial blood clots
Apply dressing appropriate to the size of the wound bed. Stack dressing if necessary. Cover with appropriate secondary dressing.
Gently lift the dressing away from the wound.
Clean the wound with saline solution or wound cleanser.
Patch, perforated or non-perforated: | ||
2″ × 2″, 3″ × 4″; CPT 15400-15421 | ||
Roll, perforated or non-perforated: | 3″ × 48′, 3″ × 24″, | |
3″ × 12″; CPT 15400-15421 | ||
Sheet, perforated or non-perforated: | ||
7″ × 18″; CPT 15400-15421 | ||
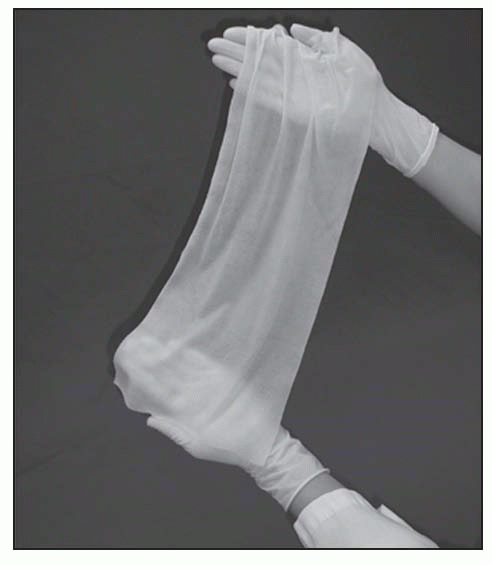 |
Contraindicated on patients with multiple or serum allergies
Contraindicated over large areas of adherent eschar
Apply E-Z Derm to partial-thickness wounds as soon as possible after the injury occurs. Delay allows for wound bed drying or crusting, which retards epithelial regeneration.
Thoroughly clean the wound and remove all debris and necrotic tissue. Even small amounts of resident bacteria or excessive fluid loss may prevent E-Z Derm from adhering.
Sterilely remove E-Z Derm from its package. Apply either side of the E-Z Derm to the wound.
Wrap with light gauze or tubular net dressing.
Monitor for 24 hours, then inspect every 12 to 24 hours to detect any purulent accumulations under the skin. If a rash unrelated to other therapy or systemic antibiotic therapy occurs, discontinue use of E-Z Derm.
If E-Z Derm doesn’t adhere, thoroughly clean the wound and reapply new E-Z Derm. If E-Z Derm hasn’t begun to adhere after 48 hours or four to five changes, take wound cultures to monitor wound status. Use an appropriate antibiotic to eradicate any gram-negative bacteria. Failure to adhere usually indicates original misdiagnosis of wound depth or bacterial proliferation.
As epithelium regenerates, E-Z Derm sloughs from the injured area.
Areas of dry, nonadherent E-Z Derm indicate subsurface healing and should be trimmed away.
Not intended for use
for more than 29 consecutive days
for pediatric patients.
Not for use on individuals who
have suspected or confirmed rectal mucosal impairment (that is, severe proctitis, ischemic proctitis, mucosal ulcerations)
have had rectal surgery within the past year
have any rectal or anal injury
have hemorrhoids of significant size and/or symptoms
have a rectal or anal stricture or stenosis
have a suspected or confirmed rectal or anal tumor
have any in-dwelling rectal or anal device (e.g., thermometer) or delivery mechanism (e.g., suppositories or enemas) in place
are sensitive to or who have had an allergic reaction to any components within the kit.
In addition to the device kit, gloves and lubricant will be required.
Using the syringe provided, remove any residual air that may be in the balloon by attaching the syringe to the inflation port and withdrawing the plunger. Ensure that the syringe is empty by expelling any air. Then fill this empty syringe with 45 mL tap water or saline. Don’t overfill beyond 45 mL.
Attach the syringe to the inflation port (marked 45 mL).
Securely snap the collection bag to the connector at the end of the catheter.
Position the patient in left side-lying position; if unable to tolerate, position the patient so access to the rectum is possible.
Perform a digital rectal exam to evaluate suitability for insertion of device.
Remove any indwelling or anal device prior to insertion of the Flexi-Seal FMS device.
Unfold the length of the catheter to lay it flat on the bed, extending the collection bag toward the foot of the bed. Insert a lubricated, gloved index finger into the retention balloon cuff finger pocket for digital guidance during device insertion. The finger pocket is located above the position indicator line. Coat the balloon end of the catheter with lubricating jelly. Grasp the catheter and gently insert the balloon end through the anal sphincter until the balloon is beyond the external orifice and well inside the rectal vault. The finger may be removed or remain in place in the rectum during balloon inflation.
Inflate the balloon with 45 mL of water or saline by slowly depressing the syringe plunger. Under no circumstances should the balloon be inflated with more than 45 mL. The oval inflation indication chamber on the inflation port will expand as fluid is injected. This normal expansion should subside once the plunger stops. If the inflation indication chamber remains excessively expanded after the plunger stops, the balloon is not properly inflating. This is likely the result of improper balloon positioning in the rectal vault. In this case, use the syringe to withdraw the fluid from the balloon, reposition the balloon in the rectal vault and reinflate the balloon.
Remove the syringe from the inflation port, and gently pull on the soft silicone catheter to check that the balloon is securely in the rectum and that it’s positioned against the rectal floor.
Position the length of the flexible silicone catheter along patient’s leg, avoiding kinks and obstructions. Take note of the position indicator line relative to the patient’s anus. Regularly observe changes in the location of the position indicator line as a means to determine movement of the retention balloon in the patient’s rectum. This may indicate the need for the balloon or device to be repositioned.
Hang the bag by the strap on the bedside at a position lower than that of the patient.
The silicone catheter can be rinsed by filling the syringe with tap water at room temperature and attaching the syringe to the irrigation port (marked IRRIG.) and depressing the plunger. Make sure that the syringe isn’t inadvertently attached to the balloon inflation port (marked 45 mL). Repeat the irrigation procedure as often as necessary to maintain proper functioning of the device. Flushing the device as described above is an optional procedure for use only when needed to maintain the unobstructed flow of stool into the collection bag. If repeated flushing with water does not return the flow of stool through the catheter, the device should be inspected to ascertain that there is no external obstruction (pressure from a body part, piece of equipment, or resolution of diarrhea). If no source of obstruction of the device is detected, use of the device should be discontinued.
Change the collection bag as needed. Snap the cap onto each used bag and discard according to institutional protocol for disposal of medical waste. Observe the device frequently for obstructions from kinks, solid fecal particles, or external pressure.
To remove the catheter from the rectum, the retention balloon must first be deflated. Attach the syringe to the inflation port, and slowly withdraw all water from the retention balloon. Disconnect the syringe and discard.
Grasp the catheter as close to the patient as possible, and slowly slide it out of the anus.
Dispose of the device in accordance with institutional protocol for disposal of medical waste.
Catheter kit: | Contains catheter, collection bag, syringe, instructions, and quick reference guide. |
Disposable collection bag: | 2,000 mL capacity |
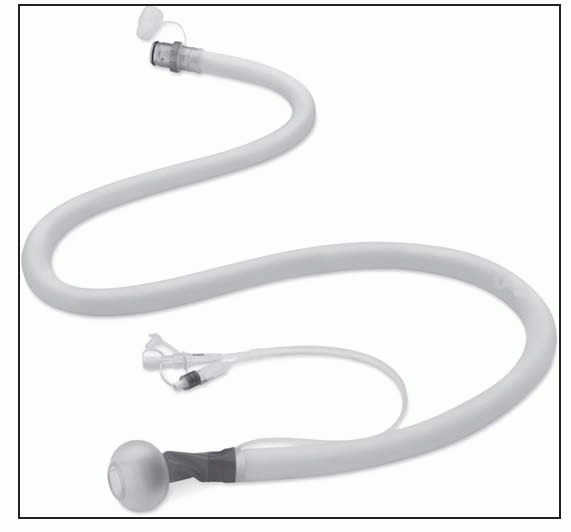 |
Stay updated, free articles. Join our Telegram channel

Full access? Get Clinical Tree


