Transducer System Setup
The exact type of transducer system used depends on the patient’s needs and the doctor’s preference. Some systems monitor pressure continuously, whereas others monitor pressure intermittently. Single-pressure transducers monitor only one type of pressure—for example, pulmonary artery pressure (PAP). Multiple-pressure transducers can monitor two or more types of pressure, such as PAP and central venous pressure.
Equipment
Bag of flush solution (usually 500 mL of normal saline solution) ▪ pressure infusion bag ▪ medication-added label ▪ preassembled disposable pressure tubing with flush device and disposable transducer ▪ monitor and monitor cable ▪ IV pole with transducer mount ▪ leveling device ▪ sterile, nonvented stopcock caps ▪ sterile gauze package ▪ Optional: 500 to 1,000 units of heparin to add to flush bag.
Implementation
To set up and zero a single-pressure transducer system, perform the following steps.
Setting Up the System
Gather the appropriate equipment
Follow your facility’s policy on adding heparin to the flush solution. If your patient has a history of bleeding or clotting problems, use heparin with caution. Add the ordered amount of heparin to the solution—usually 1 to 2 units of heparin per milliliter of solution—and then label the bag.4
Put the pressure module into the monitor, if necessary, and connect the transducer cable to the monitor.
Remove the preassembled pressure tubing from the package. If necessary, connect the pressure tubing to the transducer. Tighten all tubing connections.
Position all stopcocks so the flush solution flows through the entire system. Then roll the tubing’s flow regulator to the “off” position.
Spike the flush solution bag with the tubing, invert the bag, open the roller clamp, and squeeze all the air through the drip chamber. Then compress the tubing’s drip chamber, filling it no more than halfway with the flush solution.
Place the flush solution bag into the pressure infuser bag. To do this, hang the pressure infuser bag on the IV pole, and then position the flush solution bag inside the pressure infuser bag. Don’t inflate the pressure bag because priming the tubing under pressure can cause air bubbles to enter the system.
Open the tubing’s flow regulator, uncoil the tube if you haven’t already done so, and remove the protective cap at the end of the pressure tubing. Squeeze the continuous flush device slowly to prime the entire system, including the stopcock ports, with the flush solution.
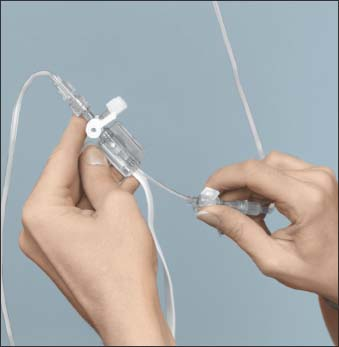
As the solution nears the disposable transducer, hold the transducer at a 45-degree angle (as shown below). This forces the solution to flow upward to the transducer. In doing so, the solution forces any air out of the system.

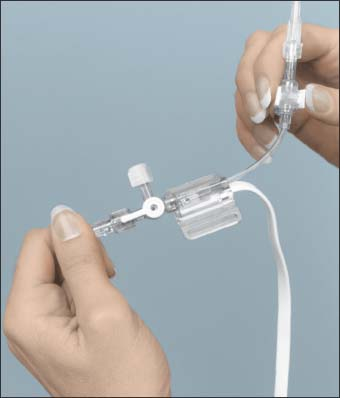
When the solution nears a stopcock, open the stopcock to air, allowing the solution to flow into the stopcock (as shown below). When the stopcock fills, close it to air and turn it open to the remainder of the tubing. Do this for each stopcock.

After removing the air from the stopcock, replace the vented cap with a sterile nonvented cap to prevent air from entering the system.
Stay updated, free articles. Join our Telegram channel

Full access? Get Clinical Tree


Get Clinical Tree app for offline access
