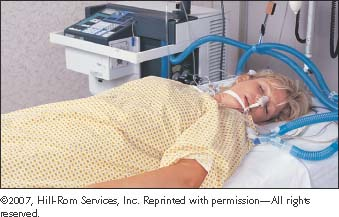
Prone Positioning
Prone positioning is a therapeutic maneuver to improve oxygenation and pulmonary mechanics in patients with acute lung injury or mechanically ventilated patients with acute respiratory distress syndrome (ARDS) who require high concentrations of inspired oxygen. Also known as proning, the procedure involves physically turning a patient from a supine position (on the back) to a facedown position (prone position).
The recommended criteria for using prone positioning include patients with ARDS who require high plateau pressure or a high fraction of inspired oxygen, which make mechanical ventilation potentially damaging to the lungs.1
The physical challenges of prone positioning have been a traditional barrier to its use. However, equipment innovations (such as a lightweight, cushioned frame that straps to the front of the patient before turning) have helped to minimize the risks associated with moving patients and maintaining them in the prone position for several hours at a time. With the appropriate equipment, prone positioning may also facilitate better movement of the diaphragm by allowing the abdomen to expand more fully.
Prone positioning is usually performed for 6 or more hours a day, for as long as 10 days, until the requirement for a high concentration of inspired oxygen resolves. Aside from early intervention, factors predictive of patients’ responses aren’t consistent among studies, and patients’ initial responses aren’t always predictive of their subsequent responses. Patients with extrapulmonary ARDS (such as ARDS resulting from multiple trauma) appear to respond consistently to prone positioning.2 Although research has demonstrated improved oxygenation with proning, it’s unclear whether the survival rate is increased.3
Prone positioning is contraindicated in patients whose heads can’t be supported in a face-down position as well as in those who can’t tolerate a head-down position. Relative contraindications include increased intracranial pressure; unstable spine, chest, or pelvis; unstable bone fractures; left-sided heart failure (nonpulmonary respiratory failure); shock; abdominal compartment syndrome; abdominal surgery; extreme obesity (greater than 300 lb [136 kg]); and pregnancy. Hemodynamically unstable patients (systolic blood pressure less than 90 mm Hg), despite aggressive fluid resuscitation and vasopressors, should be evaluated thoroughly before prone positioning is initiated.
Equipment
Vollman prone positioner (Hill-Rom) or other prone-positioning device ▪ gloves ▪ minimum of three trained staff members ▪ drawsheet ▪ small towel for under the patient’s head to catch secretions ▪ small pillows or rolled towels for positioning ▪ suction, as needed ▪ oral care supplies (see “Oral care,” page 524) ▪ eye lubricant ▪ tape ▪ Optional: personal protective equipment.
Preparation of Equipment
Clean the positioner, according to facility policy, between positioning turns and when discontinuing prone positioning.
Implementation
Verify the doctor’s order.
Confirm the patient’s identity using at least two patient identifiers according to your facility’s policy.7
Assessing the Patient
Assess the patient’s hemodynamic status to determine whether the patient can tolerate the prone position.
Assess the patient’s neurologic status before prone positioning. Generally, the patient will be sedated heavily. Although agitation isn’t a contraindication for the procedure, it must be managed effectively.
Determine whether the patient’s size and weight will allow a 180-degree turn on a narrow critical care bed. Consider obtaining a wider specialty bed if needed.
Explain the procedure to the patient and family members and answer all questions to allay their anxiety and promote cooperation.
Before Turning the Patient
Gather the equipment.
Obtain the help of two coworkers. A minimum of three trained staff members is required.
Provide eye care, including lubrication and horizontal taping of eyelids, if indicated.1
Ensure that the patient’s tongue is inside the mouth; if it’s edematous or protruding, insert a bite block.1
Secure the patient’s endotracheal (ET) tube or tracheotomy tube to prevent accidental dislodgment.1
Perform anterior body wound care and dressing changes.1
Empty ileostomy or colostomy drainage bags.1
Remove anterior chest wall electrocardiogram (ECG) monitoring leads, making sure the patient’s cardiac rate and rhythm
can still be monitored; these leads will be repositioned on the patient’s back after she’s prone.1
Ensure that the brake of the bed is engaged.
Attach the surface of the prone positioner to the bed frame, as recommended by the manufacturer.
Position the three staff members appropriately: one on either side of the bed and one at the head of the bed.1
Nursing Alert
The staff member at the head of the bed is responsible for monitoring the ET tube and mechanical ventilator tubing.
Adjust all patient tubing and invasive monitoring lines to prevent dislodging, kinking, disconnection, or contact with the patient’s body during the turning procedure and while the patient remains in the prone position.
Nursing Alert
Place all lines inserted in the upper torso over the right or left shoulder (as shown below), with the exception of chest tubes, which are placed at the foot of the bed. All lines inserted in the lower torso are positioned at the foot of the bed.1
 |
Turn the patient’s face away from the ventilator, placing the ET tubing on the side of the patient’s face that’s turned away from the ventilator.1 Loop the remaining tubing above the patient’s head to prevent disconnection of the ventilator tubing or kinking of the ET tube.
Stay updated, free articles. Join our Telegram channel

Full access? Get Clinical Tree


Get Clinical Tree app for offline access
