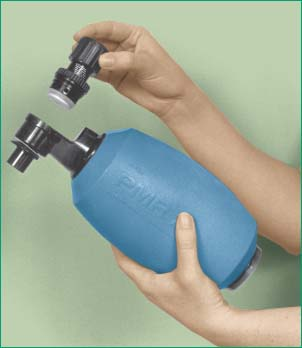
Manual Ventilation
A handheld resuscitation bag is an inflatable device that can be attached to a face mask or directly to an endotracheal (ET) or tracheostomy tube, allowing manual delivery of oxygen or room air to the lungs of a patient who can’t breathe by himself. Typically used in emergencies, manual ventilation also can be performed while the patient is temporarily disconnected from a mechanical ventilator, such as during a tubing change, during transport, or before suctioning. In such instances, use of the handheld resuscitation bag maintains ventilation.
During cardiopulmonary resuscitation (CPR), however, using a handheld resuscitation bag to administer rescue breaths is less important than providing high-quality chest compressions. Lone rescuers should begin chest compressions first. After 30 compressions, the rescuer should then administer two breaths. When a second person arrives, a handheld resuscitation bag can be used to administer two breaths after every 30 compressions.
Equipment
Handheld resuscitation bag ▪ mask, if needed ▪ oxygen source (wall unit or tank) ▪ oxygen tubing ▪ nipple adapter attached to oxygen flowmeter ▪ gloves ▪ gown, goggles, or face shield, if needed ▪ oropharyngeal or nasopharyngeal airway ▪ Optional: oxygen accumulator (oxygen reservoir), positive end-expiratory pressure (PEEP) valve, suction source, tubing, catheters. (See Using a PEEP valve.)
Preparation of Equipment
Unless the patient is intubated or has a tracheostomy, select a mask that fits snugly over the mouth and nose. Attach the mask to the resuscitation bag.
If oxygen is readily available, connect the handheld resuscitation bag to the oxygen source. Attach one end of the tubing to the bottom of the bag and the other end to the nipple adapter on the flowmeter of the oxygen source.
Turn on the oxygen, and adjust the flow rate to 15 L. If the patient has a low partial pressure of arterial oxygen, he’ll need a higher fraction of inspired oxygen (FIO2). To increase the concentration of inspired oxygen, you can add an oxygen accumulator (also called an oxygen reservoir). This device, which attaches to an adapter on the bottom of the bag, permits an FIO2 of up to 100%. If time allows, set up suction equipment.
Using A PEEP Valve
To add positive end-expiratory pressure (PEEP) to manual ventilation, attach a PEEP valve to the resuscitation bag. This addition may improve oxygenation if the patient hasn’t responded to increased fraction of inspired oxygen levels. Always use a PEEP valve to manually ventilate a patient who has been receiving PEEP on the ventilator.
 |
Implementation
Perform hand hygiene,1,2,3 put on gloves and other personal protective equipment, and follow standard precautions.4
Explain the procedure to the patient. Answer any questions to decrease anxiety and increase cooperation.
Before using the handheld resuscitation bag, check the patient’s upper airway for foreign objects. If present, remove them because this alone may restore spontaneous respirations in some instances. Also, foreign matter or secretions can obstruct the airway and impede resuscitation efforts.
Suction the patient to remove any secretions that may obstruct the airway. If necessary, insert an oropharyngeal or nasopharyngeal airway to maintain airway patency. If the patient has a tracheostomy or ET tube in place, suction the tube.
Stay updated, free articles. Join our Telegram channel

Full access? Get Clinical Tree


Get Clinical Tree app for offline access
