Gastrointestinal care
GI conditions affect just about everyone at one time or another. These conditions, so intimately tied to psychological health and stability, range from simple changes in bowel habits to life-threatening disorders requiring major surgery and radical lifestyle changes. GI conditions may be acute or chronic. Patient care for GI conditions also varies widely. For example, the patient with simple constipation may need only brief teaching about diet and exercise. However, the patient with colorectal cancer may need ongoing nursing care — from encouragement and support during the diagnostic workup to meticulous colostomy care during recovery.
Therapeutic GI procedures reflect the wide spectrum of systemic abnormalities. They may involve feeding a patient through a tube, teaching him how to use a gastrostomy feeding button, or minimizing his anxiety before abdominal surgery or his discomfort after it.
To carry out responsibilities like these successfully, you need to address the patient’s emotional and physical needs. Where to place the incision or what colostomy to use has important emotional implications for him. Your knowledge of anatomy and physiology as well as your familiarity with surgical procedures will influence your care plan and, ultimately, how your patient responds. The best practices recommended by organizations, such as the Wound Ostomy and Continence Nurses Society WOCN, the American Society for Gastrointestinal Endoscopy ASGE, the American Academy of Clinical Toxicology AACT, American College of Gastroenterology ACG, and the American Gastroenterological Association AGA, will significantly enhance your ability to care for your patient. In addition to evidence-based EB practices and those stemming from standard principles of science SCIENCE, many of the best practices in this chapter also reflect mandates of the Centers for Disease Control and Prevention CDC, the U.S. Food and Drug Administration FDA, the American Cancer Society ACS, the American Dental Association ADA, the American Hospital Association’s Patient Care Partnership PCP, the American Society for Parenteral and Enteral Nutrition ASPEN, and the Joint Commission on Accreditation of Healthcare Organizations JCAHO. For points related to equipment, manufacturers MFR may recommend specific guidelines.
Patients undergoing certain GI procedures, especially those that are uncomfortable or embarrassing, require considerable emotional support. Helping such patients maintain their sense of dignity, while at the same time eliciting their cooperation, requires a skillful blend of compassion and judgment.
For many GI procedures, you’ll need to work cooperatively with other staff members, including the pharmacist, physicians, laboratory personnel, diagnostic technicians, dietitians, and the case manager.
Colorectal cancer screening
In the United States and Europe, colorectal cancer is the second most common visceral neoplasm. Many studies show that screening reduces mortality from colorectal cancer.
Colorectal malignant tumors are almost always adenocarcinomas. About one-half of these are sessile lesions of the rectosigmoid area; the rest are polypoid lesions. Colorectal cancer tends to progress slowly and remains localized for a long time; consequently, it’s potentially curable in 75% of patients if early diagnosis allows resection before nodal involvement. With early diagnosis, the overall 5-year survival rate is nearing 50%.
The exact cause of colorectal cancer is unknown, but studies showing concentrated occurrences in areas of higher economic development suggest a relationship
to diets containing excess animal fat. For example, a diet including high beef consumption and little fiber has been implicated in increasing the risk of colorectal cancer. Other factors that increase the risk of developing colorectal cancer include:
to diets containing excess animal fat. For example, a diet including high beef consumption and little fiber has been implicated in increasing the risk of colorectal cancer. Other factors that increase the risk of developing colorectal cancer include:
other disease of the digestive tract
age (over 40)
history of ulcerative colitis
familial polyposis.
Signs and symptoms ACS
The early stages of colon cancer typically produce no symptoms — an individual can have colon cancer and not know it. That’s why it’s important to be tested regularly. Of course, colon cancer can sometimes produce symptoms:
blood in or on stools
a change in bowel habits — diarrhea or constipation
stools that are thinner than usual
unexplained pain, aches, or cramps in the abdomen
frequent gas pains
unexplained weight loss.
Screening tests CDC
Screening for colorectal cancer is the best intervention to prevent this disease. The Centers for Disease Control and Prevention’s campaign to increase public awareness of colorectal cancer screening includes recommendations for the following tests (see Recommendations for colorectal screening, page 404)
Fecal occult blood test (FOBT) —The FOBT is used to look for hidden blood in stools. The patient is instructed to place a small stool specimen on a card after three consecutive bowel movements. The card is returned to the physician, who tests to see whether blood is present in the stools. Although blood in the stools can be a sign of colon cancer, other causes exist, too, including eating meats before the test, bleeding from the stomach or other organs, and the presence of Helicobacter pylori.
Sigmoidoscopy —A sigmoidoscopy is used to determine the presence of polyps in the lower part of the colon. A short, flexible tube is inserted into the anus and lower colon, allowing the physician to see any polyps. Typically, this test should be performed every 5 years for patients with no known risk factors. Patients at risk typically undergo colonoscopy, during which any polyps are removed.
Colonoscopy —A colonoscopy is used to determine the presence of polyps in the entire colon. A long, flexible tube is inserted into the anus and upward into the colon, allowing the physician to see any polyps. Most polyps can be removed during the test. This test is usually done every 10 years for patients whose test results are negative, more frequently for patients whose results are positive.
Double contrast barium enema —The double contrast barium enema is an X-ray of the lower GI tract. The patient is given an enema containing barium, a contrast material, after which the physician takes an X-ray. The presence of barium enables the physician to see the outline of the colon on the X-ray. This test is usually done every 5 to 10 years for patients whose test results are negative.
Virtual colonoscopy —Research has shown that virtual colonoscopy is accurate compared to conventional colonoscopy for detection of polyps less than 6 mm in size with few false-positive results. EBI It’s a computed tomography procedure that can produce 3-dimensional images of the colon. Virtual colonoscopy is performed after a standard bowel preparation and air insufflation. The patient is exposed to some radiation but the procedure is noninvasive and has no known complications.
Equipment
Fecal occult blood test
Test kit • gloves • glass or porcelain plate • tongue blade or other wooden applicator
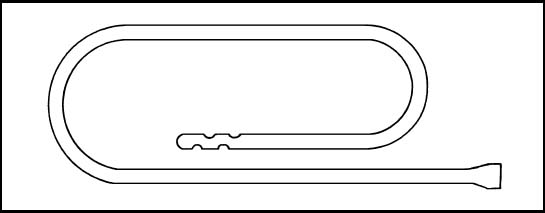
Sigmoidoscopy
Sigmoidoscope
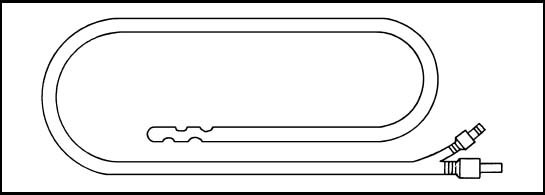
Colonoscopy
Enemas (such as Fleet) • oral laxative (such as bisacodyl or magnesium citrate) • gloves
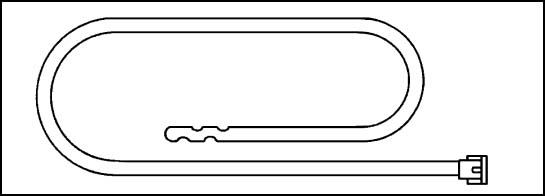
Double-contrast barium enema
Barium enema • linen-saver pad • bath blanket • bedpan or commode • disposable gloves • lubricant
Implementation
Bowel preparation is essential for adequate visualization during sigmoidoscopy or colonoscopy. Different regimens may be used, but thorough emptying of
the left side of the colon (for sigmoidoscopy) or entire colon (for colonoscopy) should be achieved. In most patients, this involves administering two Fleet enemas on the morning of the examination. Better results are achieved by adding an oral cathartic. An oral regimen alone, such as two 10-mg bisacodyl tablets or one bottle of magnesium citrate, also provides good bowel preparation.
Recommendations for colorectal screening ACS AGA ASGE EB2
The guidelines below for colorectal screening are based on the recommendations of the U.S. Multisociety Task Force on Colorectal Cancer that includes the American College of Gastroenterology, the American Society for Gastrointestinal Endoscopy, the American Gastroenterological Association, the American College of Physicians/Society of Internal Medicine, and the American Cancer Society.
| Risk category | Risk factors | Recommendations |
|---|---|---|
| Average risk |
|
|
| Increased risk |
|
|
For all of the tests, be sure to provide a detailed explanation to the patient about the test ordered and provide educational materials, if possible. For colonoscopy, obtain the necessary consent forms. PCP
Because these tests are intrusive and usually embarrassing for the patient, the nurse should strive to maintain patient privacy and dignity.
Provide privacy for the patient.
Wash your hands and put on gloves. CDC
Fecal occult blood test
If the patient is going to use a hemoccult slide test, instruct him to open the flap on the slide packet, use the wooden applicator to apply a thin stool specimen to the guaiac-impregnated filter paper to Box A, and apply a second specimen to the filter paper in Box B.
If you’re going to perform the test using the Hematest reagent tablet test, use a wooden applicator to smear a thin stool specimen on the filter paper supplied with the test kit. Or, after performing a digital rectal examination, wipe the finger used for the examination on a square of the filter paper, and place the filter paper on a glass plate.
Remove a reagent tablet from the bottle and immediately replace the cap tightly. Place the tablet in the center of the stool smear.
Add one drop of water to the tablet and allow it to soak in for 5 to 10 seconds. Add a second drop, letting it run from the tablet onto the specimen and filter paper. If necessary, tap the plate gently to dislodge any water from the top of the tablet.
After 2 minutes, the filter paper will turn blue if the test is positive. Don’t read the color that appears on the tablet itself or that develops on the filter paper after the 2-minute period.
Note the results and discard the filter paper.
Remove and discard your gloves and wash your hands thoroughly.
Allow the specimens to dry for 3 to 5 minutes, then open the flap on the reverse side of the slide packet and place 2 drops of Hemoccult developing solution over each specimen smear on the paper. If the test is positive for occult blood, a blue reaction will appear in 30 to 60 seconds.
Record the results and discard the slide package.
Sigmoidoscopy
Explain that he also may have sigmoid discomfort after the procedure.
Colonoscopy
Barium enema
Tell the patient that he may experience a sensation of fullness and gas or cramping while the solution is being administered.
Help the patient into the left lateral position, with his right leg flexed.
Place the linen-saver pad under the patient’s buttocks and drape him with the bath blanket.
Lubricate about 2″ (5 cm) of the enema’s rectal tube if necessary. Run some solution through the connecting tube to expel any air in the tubing, then close the clamp.
Put on gloves. CDC
Lift the patient’s upper buttock and insert the rectal tube smoothly and slowly about 3″ to 4″ (7.5 to 10 cm) into the rectum, directing it toward the umbilicus. If you feel resistance, ask the patient to take a deep breath; then, run a small amount of the solution through the tube to relax the anal sphincter. If you still feel resistance, notify the physician immediately; never force the tube to enter.
With the tube in place, slowly administer the enema solution either by raising the solution container and opening the clamp, or by compressing the pliable container by hand.
After instilling all of the solution or when the patient has the urge to defecate, close the clamp and remove the rectal tube.
To help the patient retain the enema as ordered, keep him in the side-lying position as long as possible before assisting him onto the bedpan or commode.
Special considerations
The most effective treatment for colorectal cancer is surgery to remove the tumor and the adjacent tissues
as well as any lymph nodes that may contain cancer cells.
The type of surgery depends on the location of the tumor.
Chemotherapy and radiation therapy may be used for patients with metastasis, residual disease, or a recurrent inoperable tumor.
Nursing diagnoses
Anxiety
Expected outcomes
The patient will:
cope with GI procedure without severe signs of anxiety
recognize need for preparation of GI procedure and complete it successfully.
Complications
Complications of sigmoidoscopy and colonoscopy include bleeding and adverse reactions to anesthesia.
Documentation
Be sure to document the date and time of the test and record the results, the patient’s vital signs and, in colonoscopy, his response to anesthesia.
Supportive references
Johnson, B.A. “Flexible Sigmoidoscopy: Screening for Colorectal Cancer”, American Family Physician 59(2):313-27, January 1999.
O’Hare, A. and Fenlon, H. “Virtual Colonoscopy in the Detection of Colonic Polyps and Neoplasms”, Best Practice Research. Clinical Gastroenterology. 20(1):79-92, February 2006. EB1
Winawer, S., et al. “Colorectal Cancer Screening and Surveillance: Clinical Guidelines and Rationale — Update Based on New Evidence”, Gastroenterology 124(2):544-60, February 2003. EB2
Colostomy and ileostomy care
A patient with an ascending or transverse colostomy or an ileostomy must wear an external pouch to collect emerging fecal matter, which will be watery or pasty. Besides collecting waste matter, the pouch helps to control odor and to protect the stoma and peristomal skin. Most disposable pouching systems can be used for 2 to 7 days; some models last even longer.
All pouching systems need to be changed immediately if a leak develops, and every pouch needs emptying when it’s one-third to one-half full. The patient with an ileostomy may need to empty his pouch 4 or 5 times daily.
Naturally, the best time to change the pouching system is when the bowel is least active, usually between 2 and 4 hours after meals. After a few months, most patients can predict the best changing time.
The selection of a pouching system should take into consideration which system provides the best adhesive seal and skin protection for the individual patient. The type of pouch selected also depends on the stoma’s location and structure, availability of supplies, wear time, consistency of effluent, personal preference, and finances.
Equipment
Pouching system • stoma measuring guide • stoma paste (if drainage is watery to pasty or stoma secretes excess mucus) • scissors • washcloth and towel • closure clamp • toilet or bedpan • water or pouch cleaning solution • gloves • facial tissues • optional: ostomy belt, paper tape, mild nonmoisturizing soap, skin shaving equipment, liquid skin sealant, and pouch deodorant
Pouching systems may be drainable or closed-bottomed, disposable or reusable, adhesive-backed, and one-piece or two-piece. (See Comparing ostomy pouching systems.)
Implementation
Provide privacy and emotional support. CDC
Fitting the pouch and skin barrier
For a pouch with an attached skin barrier, measure the stoma with the stoma measuring guide. Select the opening size that matches the stoma.
For an adhesive-backed pouch with a separate skin barrier, measure the stoma with the measuring guide and select the opening that matches the stoma. Trace the selected size opening onto the paper back of the skin barrier’s adhesive side. Cut out the opening. (If the pouch has precut openings, which can be handy for a round stoma, select an opening that’s 1/8″ larger than the stoma. If the pouch comes without an opening,
cut the hole 1/8″ wider than the measured tracing.) The cut-to-fit system works best for an irregularly shaped stoma. WOCN
Comparing ostomy pouching systems
Manufactured in many shapes and sizes, ostomy pouches are fashioned for comfort, safety, and easy application. For example, a disposable closed-end pouch may meet the needs of a patient who irrigates his ostomy, who wants added security, or who wants to discard the pouch after each bowel movement. Another patient may prefer a reusable, drainable pouch. Some commonly available pouches are described below.
Disposable pouches
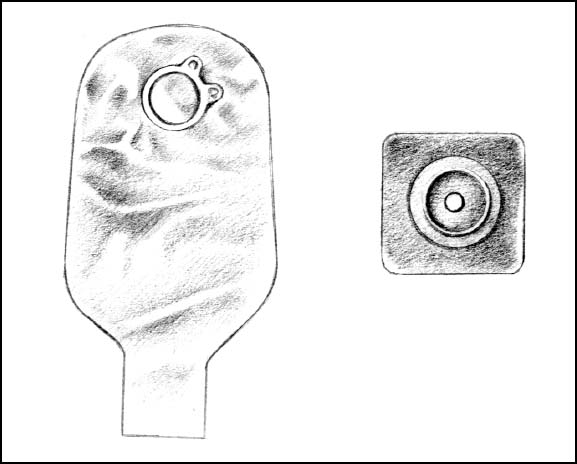
The patient who must empty his pouch often (because of diarrhea or a new colostomy or ileostomy) may prefer a one-piece, drainable, disposable pouch with a closure clamp attached to a skin barrier (as shown below). These transparent or opaque, odor-proof, plastic pouches come with attached adhesive or karaya seals. Some pouches have microporous adhesive or belt tabs. The bottom opening allows for easy draining. This pouch may be used permanently or temporarily, until stoma size stabilizes.
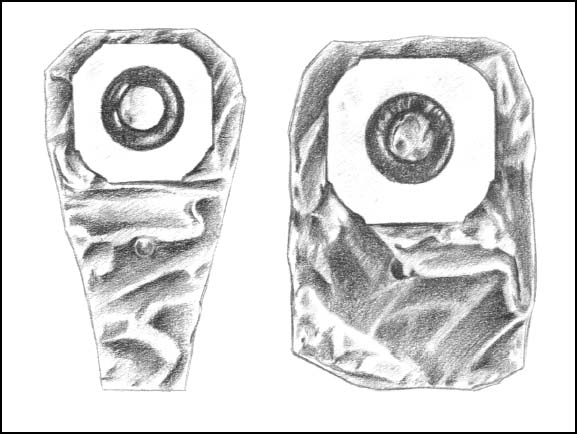 |
Also disposable and also made of transparent or opaque odor-proof plastic, a one-piece disposable closed-end pouch (as shown) may come in a kit with adhesive seal, belt tabs, skin barrier, or carbon filter for gas release. A patient with a regular bowel elimination pattern may choose this style for additional security and confidence.
A two-piece, drainable, disposable pouch with separate skin barrier (as shown) permits frequent changes and also minimizes skin breakdown. Also made of transparent or opaque odor-proof plastic, this style comes with belt tabs and usually snaps to the skin barrier with a flange mechanism.
 |
Reusable pouches
Typically manufactured from sturdy, opaque, hypoallergenic plastic, the reusable pouch comes with a separate custom-made faceplate and O-ring, (as shown below). Some pouches have a pressure valve for releasing gas. The device has a 1- to 2-month life span, depending on how frequently the patient empties the pouch.
Reusable equipment may benefit a patient who needs a firm faceplate or who wishes to minimize cost. However, many reusable ostomy pouches aren’t odor-proof.
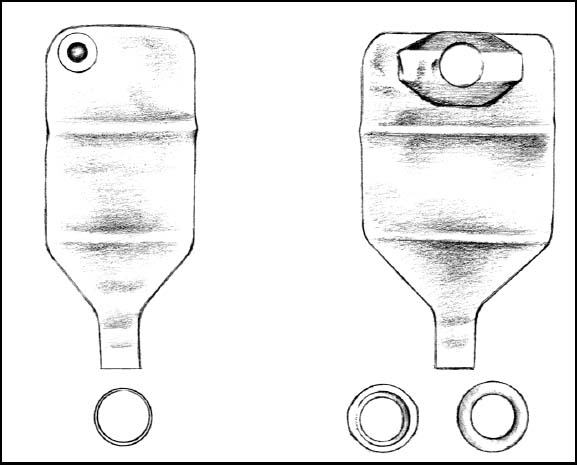 |
Applying a skin barrier and pouch
Fitting a skin barrier and ostomy pouch properly can be done in a few steps. Shown below is a two-piece pouching system with flanges, which is in common use.
1. Measure the stoma using a measuring guide.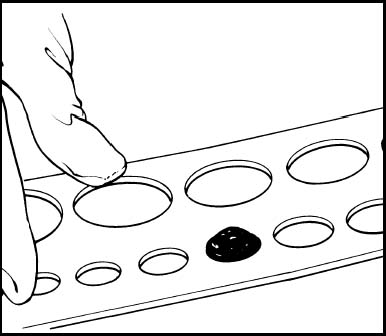 | 2. Trace the appropriate circle carefully on the back of the skin barrier.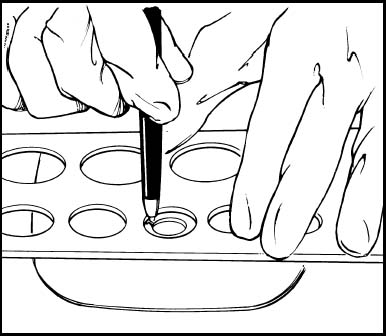 | 3. Cut the circular opening in the skin barrier. Bevel the edges to keep them from irritating the patient.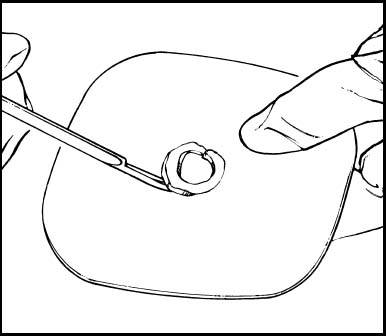 | 4. Remove the backing from the skin barrier and moisten it or apply barrier paste, as needed, along the edge of the circular opening.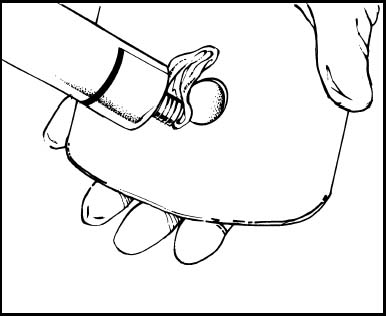 | 5. Center the skin barrier over the stoma, adhesive side down, and gently press it to the skin.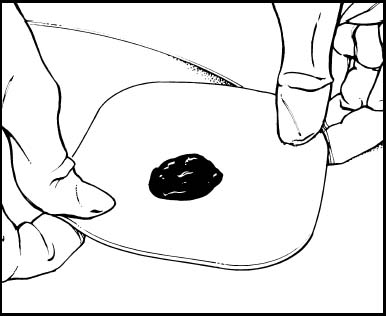 | 6. Gently press the pouch opening onto the ring until it snaps into place.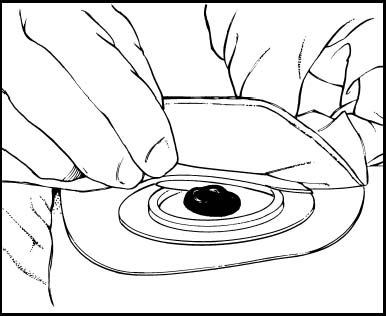 |
For a two-piece pouching system with flanges, see Applying a skin barrier and pouch.
Avoid fitting the pouch too tightly because the stoma has no pain receptors. A constrictive opening could injure the stoma or skin tissue without the patient feeling warning discomfort. Avoid cutting the opening too big because this may expose the skin to fecal matter and moisture. WOCN
The patient with a descending or sigmoid colostomy who has formed stools and whose ostomy doesn’t secrete much mucus may choose to wear only a pouch. In this case, make sure the pouch opening closely matches the stoma size.
Between 6 weeks and 1 year after surgery, the stoma will shrink to its permanent size. At that point, pattern-making preparations will be unnecessary unless the patient gains weight, has additional surgery, or injures the stoma.
Applying or changing the pouch
Collect all equipment.
Provide privacy, wash your hands, and put on gloves. CDC
Confirm the patient’s identity using two patient identifiers according to facility policy. JCAHO
Explain the procedure to the patient. As you perform each step, explain what you’re doing and why because the patient will eventually perform the procedure himself. PCP
Remove and discard the old pouch. Wipe the stoma and peristomal skin gently with a facial tissue.
Carefully wash with mild soap and water and dry the peristomal skin by patting gently. Allow the skin to dry thoroughly. Inspect the peristomal skin and stoma. If necessary, shave surrounding hair (in a direction away from the stoma) to promote a better seal and avoid skin irritation from hair pulling against the adhesive. WOCN
If applying a separate skin barrier, peel off the paper backing of the prepared skin barrier, center the barrier over the stoma, and press gently to ensure adhesion.
You may want to outline the stoma on the back of the skin barrier (depending on the product) with a thin ring of stoma paste to provide extra skin protection. (Skip this step if the patient has a sigmoid or descending colostomy, formed stools, and little mucus.)
Remove the paper backing from the adhesive side of the pouching system and center the pouch opening over the stoma. Press gently to secure.
For a pouching system with flanges, align the lip of the pouch flange with the bottom edge of the skin barrier flange. Gently press around the circumference of the pouch flange, beginning at the bottom, until the pouch securely adheres to the barrier flange. (The pouch will click into its secured position.) Holding the barrier against the skin, gently pull on the pouch to confirm the seal between flanges.
Encourage the patient to stay quietly in position for about 5 minutes to improve adherence. The patient’s body warmth also helps to improve adherence and soften a rigid skin barrier. SCIENCE WOCN
Attach an ostomy belt to further secure the pouch, if desired. (Some pouches have belt loops, and others have plastic adapters for belts.)
Leave a bit of air in the pouch to allow drainage to fall to the bottom.
Apply the closure clamp, if necessary.
If desired, apply paper tape in a picture-frame fashion to the pouch edges for additional security.
Emptying the pouch WOCN
Put on gloves. CDC
Tilt the bottom of the pouch upward and remove the closure clamp.
Turn up a cuff on the lower end of the pouch and allow it to drain into the toilet or bedpan.
Wipe the bottom of the pouch and reapply the closure clamp.
If desired, the bottom portion of the pouch can be rinsed with cool tap water. Don’t aim water up near the top of the pouch because this may loosen the seal on the skin.
A two-piece flanged system can also be emptied by unsnapping the pouch. Let the drainage flow into the toilet.
Release flatus through the gas release valve if the pouch has one. Otherwise, release flatus by tilting the pouch bottom upward, releasing the clamp, and expelling the flatus. To release flatus from a flanged system, loosen the seal between the flanges. (Some pouches have gas release valves.)
Never make a pinhole in a pouch to release gas. This destroys the odor-proof seal.
Remove and discard gloves. CDC
Special considerations
After performing and explaining the procedure to the patient, encourage the patient’s increasing involvement in self-care.
Use adhesive solvents and removers only after patch-testing the patient’s skin because some products may irritate the skin or produce hypersensitivity reactions. Consider using a liquid skin sealant, if available, to give skin tissue additional protection from drainage and adhesive irritants.
Remove the pouching system if the patient reports burning or itching beneath it or purulent drainage around the stoma. Notify the physician or therapist of any skin irritation, breakdown, rash, or unusual appearance of the stoma or peristomal area.
Use commercial pouch deodorants if desired. However, most pouches are odor-free, and odor should be evident only when you empty the pouch or if it leaks. Before discharge, suggest that the patient avoid odor-causing foods, such as fish, eggs, onions, and garlic.
If the patient wears a reusable pouching system, suggest that he obtain two or more systems so he can wear one while the other dries after cleaning with soap and water or a commercially prepared cleaning solution.
Nursing diagnoses
Disturbed body image
Effective therapeutic regimen management
Impaired skin integrity
Expected outcomes
The patient will:
acknowledge change in body image and communicate feelings about change
recognize potential problems in the management of his stoma and identify needs
explain skin care regimen.
Complications
Failure to fit the pouch properly over the stoma or improper use of a belt can injure the stoma.
Be alert for a possible allergic reaction to adhesives and other ostomy products.
Documentation
Record the date and time of the pouching system change and note the character of drainage, including color, amount, type, and consistency. Describe the appearance of the stoma and the peristomal skin. Document patient teaching. Describe the teaching content. Record the patient’s response to self-care, and evaluate his learning progress.
Supportive references
Craven, R., and Hirnle, C. Fundamentals of Nursing: Human Health and Function, 4th ed. Philadelphia: Lippincott Williams & Wilkins, 2002.
Feeding tube insertion and removal
Inserting a feeding tube nasally or orally into the stomach or duodenum allows a patient who can’t or won’t eat to receive nourishment. The feeding tube also permits supplemental feedings in a patient who has very high nutritional requirements, such as an unconscious patient or one with extensive burns. Typically, the procedure is done by a nurse, as ordered. The preferred feeding tube route is nasal, but the oral route may be used for patients with such conditions as a head injury, deviated septum, or other nose injury.
The physician may order duodenal feeding when the patient can’t tolerate gastric feeding or when he expects gastric feeding to produce aspiration. Absence of bowel sounds or possible intestinal obstruction contraindicates using a feeding tube. AGA
Feeding tubes differ somewhat from standard nasogastric tubes. Made of silicone, rubber, or polyurethane, feeding tubes have small diameters and great flexibility. This reduces oropharyngeal irritation, necrosis from pressure on the tracheoesophageal wall, distal esophageal irritation, and discomfort from swallowing. To facilitate passage, some feeding tubes are weighted with tungsten, and some need a guide wire to keep them from curling in the back of the throat.
These small-bore tubes usually have radiopaque markings and a water-activated coating, which provides a lubricated surface.
Equipment
For insertion
Feeding tube (#6 to #18 French, with or without guide) • linen-saver pad • gloves • hypoallergenic tape • water-soluble lubricant • cotton-tipped applicators
• skin preparation (such as compound benzoin tincture) • facial tissues • penlight • small cup of water with straw, or ice chips • emesis basin • 60-ml syringe • pH test strip • water
• skin preparation (such as compound benzoin tincture) • facial tissues • penlight • small cup of water with straw, or ice chips • emesis basin • 60-ml syringe • pH test strip • water
During use
Mouthwash or normal saline solution • toothbrush
For removal
Linen-saver pad • tube clamp
Preparation of equipment
Have the proper size tube available. Usually, the physician orders the smallest-bore tube that will allow free passage of the liquid feeding formula.
Read the instructions on the tubing package carefully because tube characteristics vary according to the manufacturer. (For example, some tubes have marks at the appropriate lengths for gastric, duodenal, and jejunal insertion.) MFR
Examine the tube to make sure it’s free from defects, such as cracks or rough or sharp edges.
Next, run water through the tube. This checks for patency, activates the coating, and facilitates removal of the guide.
Implementation
Confirm the patient’s identity using two patient identifiers according to facility policy. JCAHO
Explain the procedure to the patient and show him the tube so he knows what to expect and can cooperate more fully. PCP
Provide privacy. Wash your hands and put on gloves. CDC
Assist the patient into semi-Fowler’s or high Fowler’s position. AGA
Place a linen-saver pad across the patient’s chest to protect him from spills.
To determine the tube length needed to reach the stomach, first extend the distal end of the tube from the tip of the patient’s nose to his earlobe. Coil this portion of the tube around your fingers so the end stays curved until you insert it. Then extend the uncoiled portion from the earlobe to the xiphoid process. Use a small piece of hypoallergenic tape to mark the total length of the two portions.
Inserting the tube nasally
Using the penlight, assess nasal patency. Inspect nasal passages for a deviated septum, polyps, or other obstructions. Occlude one nostril, then the other, to determine which has the better airflow. Assess the patient’s history of nasal injury or surgery. SCIENCE
Lubricate the curved tip of the tube (and the feeding tube guide, if appropriate) with a small amount of water-soluble lubricant to ease insertion and prevent tissue injury.
Ask the patient to hold the emesis basin and facial tissues in case he needs them.
To advance the tube, insert the curved, lubricated tip into the more patent nostril and direct it along the nasal passage toward the ear on the same side. When it passes the nasopharyngeal junction, turn the tube 180 degrees to aim it downward into the esophagus. Instruct the patient to lower his chin to his chest to close the trachea. Then give him a small cup of water with a straw or ice chips. Direct him to sip the water or suck on the ice and swallow frequently. This will ease the tube’s passage. Advance the tube as he swallows. SCIENCE
Inserting the tube orally
Have the patient lower his chin to close his trachea, and ask him to open his mouth.
Place the tip of the tube at the back of the patient’s tongue, give water, and instruct the patient to swallow, as above. Remind him to avoid clamping his teeth down on the tube. Advance the tube as he swallows.
Positioning the tube
Keep passing the tube until the tape marking the appropriate length reaches the patient’s nostril or lips. Tube placement should be confirmed by X-ray. ASPEN
After confirming proper tube placement, remove the tape marking the tube length.
Tape the tube to the patient’s nose and remove the guide wire.
To advance the tube to the duodenum, especially a tungsten-weighted tube, position the patient on his right side. This lets gravity assist tube passage through the pylorus. Move the tube forward 2″ to 3″ (5 to 7.5 cm) hourly until X-ray studies confirm duodenal placement. (An X-ray must confirm placement before feeding begins because duodenal feeding can cause
nausea and vomiting if accidentally delivered to the stomach.) AGA EB
Apply a skin preparation to the patient’s cheek before securing the tube with tape. This helps the tube adhere to the skin and prevents irritation.
Tape the tube securely to the patient’s cheek to avoid excessive pressure on his nostrils.
Removing the tube
Protect the patient’s chest with a linen-saver pad.
Flush the tube with air, clamp or pinch it to prevent fluid aspiration during withdrawal, and withdraw it gently but quickly.
Promptly cover and discard the used tube.
Special considerations
Check gastric residual contents before each feeding. Feeding should be held if residual volumes are greater than 200 ml on two successive assessments. ASPEN Successful aspiration also confirms correct tube placement before feeding by testing the pH of the gastric aspirate. Attach the syringe to the tube and gently aspirate stomach contents. Examine the aspirate and place a small amount on the pH test strip. Probability of gastric placement is increased if the aspirate has a typical gastric fluid appearance (grassy-green, clear and colorless with mucus shreds, or brown) and the pH is less than or equal to 5.
Ideally, tube tip placement should be confirmed by X-ray. ASPEN
If no gastric secretions return, the tube may be in the esophagus. You’ll need to advance the tube or reinsert it and check placement again before proceeding.
Flush the feeding tube every 4 hours with up to 20 to 30 ml of normal saline solution or warm water to maintain patency. Retape the tube at least daily and as needed. Alternate taping the tube toward the inner and outer side of the nose to avoid constant pressure on the same nasal area. Inspect the skin for redness and breakdown. AGA
Provide nasal hygiene daily using the cotton-tipped applicators and water-soluble lubricant to remove crusted secretions. Help the patient brush his teeth, gums, and tongue with mouthwash or saline solution at least twice daily.
If the patient can’t swallow the feeding tube, use a guide to aid insertion.
Precise feeding-tube placement is especially important because small-bore feeding tubes may slide into the trachea without causing immediate signs or symptoms of respiratory distress, such as coughing, choking, gasping, or cyanosis. However, the patient will usually cough if the tube enters the larynx. To make sure the tube clears the larynx, ask the patient to speak. If he can’t, the tube is in the larynx. Withdraw the tube immediately and reinsert.
When aspirating gastric contents to check tube placement, pull gently on the syringe plunger to prevent trauma to the stomach lining or bowel. If you meet resistance during aspiration, stop the procedure because resistance may result simply from the tube lying against the stomach wall. If the tube coils above the stomach, you’ll be unable to aspirate stomach contents. To rectify this, change the patient’s position or withdraw the tube a few inches, readvance it, and try to aspirate again. If the tube was inserted with a guide wire, don’t use the guide wire to reposition the tube. The physician may do so, using fluoroscopic guidance.
Nursing diagnoses
Imbalanced nutrition: Less than body requirements
Expected outcomes
The patient will:
remain at or above specified weight
not develop adverse reactions from feedings such as aspiration, diarrhea, or hyperglycemia.
Complications
Prolonged intubation may lead to skin erosion at the nostril, sinusitis, esophagitis, esophagotracheal fistula, gastric ulceration, and pulmonary and oral infection. (See Managing tube feeding problems.)
Documentation
For tube insertion, record the date, time, tube type and size, insertion site, area of placement, confirmation
of proper placement. Record the name of the person performing the procedure. For tube removal, record the date and time and the patient’s tolerance of the procedure.
of proper placement. Record the name of the person performing the procedure. For tube removal, record the date and time and the patient’s tolerance of the procedure.
Managing tube feeding problems
| Complication | Interventions |
|---|---|
| Aspiration of gastric secretions |
|
| Tube obstruction |
|
| Oral, nasal, or pharyngeal irritation or necrosis |
|
| Vomiting, bloating, diarrhea, or cramps |
|
| Constipation |
|
| Electrolyte imbalance |
|
| Hyperglycemia |
|
Supportive references
American Society for Parenteral and Enteral Nutrition. “Access for Administration of Nutrition Support”, Journal of Parenteral Enteral Nutrition 26(Suppl 1):33SA-41SA, January-February 2002. Available at: www.guideline.gov.
Bowers, S. “All About Tubes: Your Guide to Enteral Feeding Devices”, Nursing2000 30(12):41-47, December 2000. EB
Craven, R., and Hirnle, C. Fundamentals of Nursing: Human Health and Function, 4th ed. Philadelphia: Lippincott Williams & Wilkins, 2002.
Guenter, P., and Silkroski, M. Tube Feeding: Practical Guidelines and Nursing Protocols. Gaithersburg, Md.: Aspen Pubs., Inc., 2001.
Stone, S.J., et al. “Bedside Placement of Postpyloric Feeding Tubes”, AACN Clinical Issues 11(4):517-30, November 2000.
Using wide-bore gastric tubes
If you need to deliver a large volume of fluid rapidly through a gastric tube (when irrigating the stomach of a patient with profuse gastric bleeding or poisoning, for example), a wide-bore gastric tube usually serves best. Typically inserted orally, these tubes remain in place only long enough to complete the lavage and evacuate stomach contents.
Ewald tube
In an emergency, using the Ewald tube, a single-lumen tube with several openings at the distal end, allows you to aspirate large amounts of gastric contents quickly.
 |
Lavacuator tube
The lavacuator tube has two lumens. Use the larger lumen for evacuating gastric contents; the smaller, for instilling an irrigant.
 |
Gastric lavage
After poisoning or a drug overdose, especially in patients who have central nervous system depression or an inadequate gag reflex, gastric lavage flushes the stomach and removes ingested substances through a gastric lavage tube. The procedure is also used to empty the stomach in preparation for endoscopic examination. For patients with gastric or esophageal bleeding, lavage with tepid or iced water or normal saline solution may be used to stop bleeding. However, some controversy exists over the effectiveness of iced lavage for this purpose.
According to the American Academy of Clinical Toxicology, gastric lavage shouldn’t be used routinely in the management of poisoned patients. In experimental studies, the amount of marker removed by gastric lavage was highly variable and diminished with time, indicating that the method doesn’t improve clinical outcome. In fact, it’s believed that in many cases gastric lavage may cause or increase morbidity. Gastric lavage shouldn’t be used unless the patient has ingested a life-threatening amount of the poison and lavage can occur within 60 minutes of ingestion. Even in this situation, clinical improvement hasn’t been proved in controlled studies. AACT
Most physicians prefer to use unchilled normal saline solution (which may prevent rapid electrolyte loss) or even water if the patient must avoid sodium. They point out that no research exists to support the use of iced irrigant to stop acute GI bleeding.
Gastric lavage can be continuous or intermittent. Typically, this procedure is done in the emergency department or intensive care unit by a physician, gastroenterologist,
or nurse; a wide-bore lavage tube is almost always inserted by a gastroenterologist.
or nurse; a wide-bore lavage tube is almost always inserted by a gastroenterologist.
Gastric lavage is contraindicated after ingestion of a corrosive substance (such as lye, petroleum distillates, ammonia, alkalis, or mineral acids) because the lavage tube may perforate the already compromised esophagus.
Equipment
Lavage setup (two graduated containers for drainage, three pieces of large-lumen rubber tubing, Y-connector, and a clamp or hemostat) • 2 to 3 L of normal saline solution, tap water, or appropriate antidote as ordered • I.V. pole • basin of ice, if ordered • Ewald tube or any large-lumen gastric tube, typically #36 to #40 French (see Using wide-bore gastric tubes) • water-soluble lubricant or anesthetic ointment • stethoscope • ½″ hypoallergenic tape • 50-ml bulb or catheter-tip syringe • gloves • face shield • linen-saver pad or towel • Yankauer or tonsil-tip suction device • suction apparatus • labeled specimen container • laboratory request form • norepinephrine (Levophed) • optional: patient restraints, charcoal tablets
A prepackaged, syringe-type irrigation kit may be used for intermittent lavage. For poisoning or a drug overdose, however, the continuous lavage setup may be more appropriate to use because it’s a faster and more effective means of diluting and removing the harmful substance.
Preparation of equipment
Set up the lavage equipment. (See Preparing for gastric lavage.)
If iced lavage is ordered, chill the desired irrigant (water or normal saline solution) in a basin of ice.
Lubricate the end of the lavage tube with the water-soluble lubricant or anesthetic ointment.


